Powerful Landscape Masks, make easy, precise photo editing in Lightroom and ACR in Photoshop
How to use Landscape Masks in Lightroom and Photoshop ACR
This tool works identical in Lightroom as it does in Camera RAW from Photoshop. (Filter>Camera RAW) it is only in Version 2025 (26.8) (Lightroom Classic 14.4) and newer.
This is also an addition to my course Learn Masks in Lightroom and Camera RAW (this is the same video in the course, so you don’t have to re-download it if you own the course).
If you don’t have the course, check it out here at save 20% with code: PSC20Masks
We will use Lightroom to do this tutorial, its the same as in ACR.
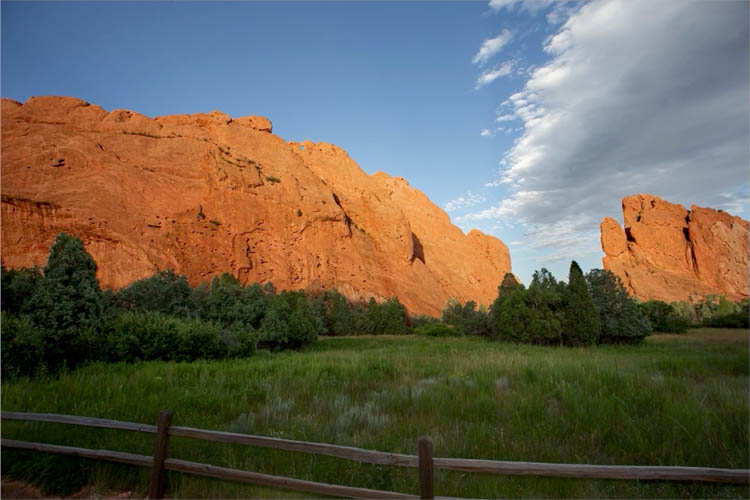
Here is an image I captured in Colorado. Notice the rocks are lacking detail and the foreground is dark.
In the develop Module, Click on the round masks button.
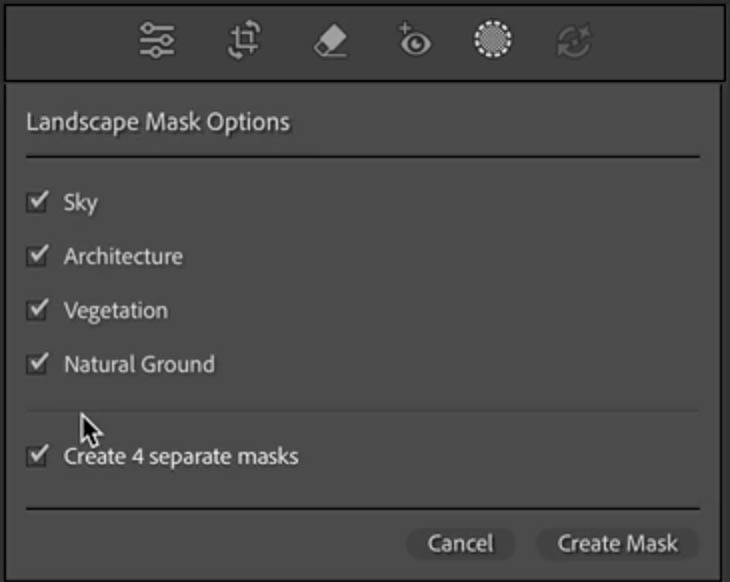
Click Landscape
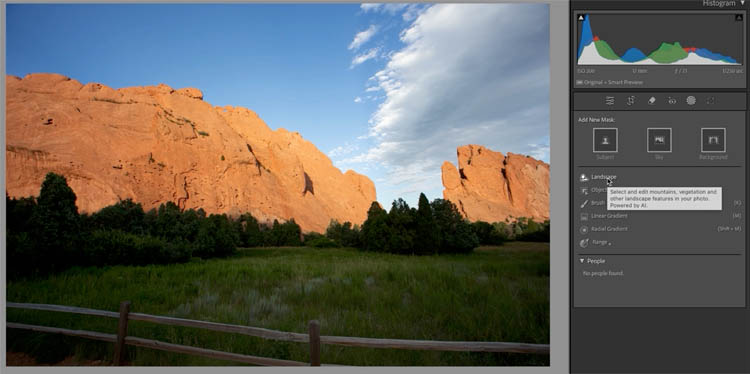
Just like it does with people, it analyzes the image and finds different features that are present in that image, things like sky, water, mountains, natural ground, artificial ground etc.
Click on the checkboxes of the features you would like masks for.
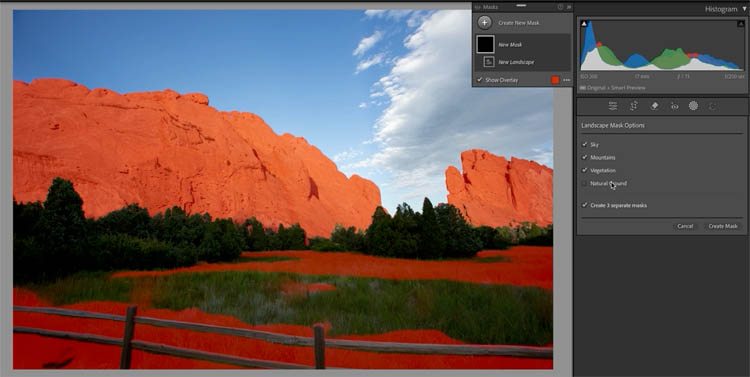
When you choose Create Mask, the masks will automatically be generated.
As you roll over the masks, you will see them highlighted in the image.
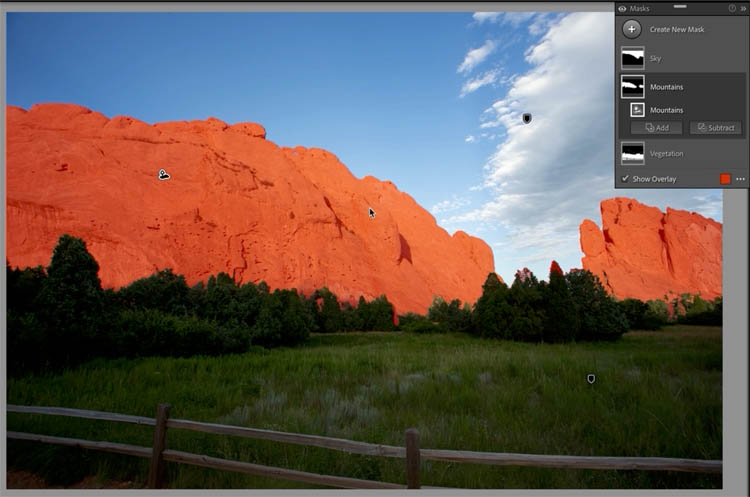
Choose the mountains mask, Moving Black to the left helps bring detail back to the rocks.
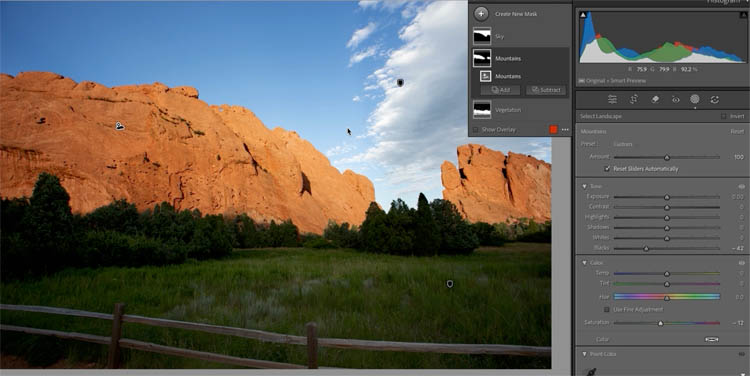
Choose vegetation
Lighten up the foreground. All the exact adjustments are show on the video at the top. The video demonstrates these moves better than we can with written words.
Notice a big improvement.
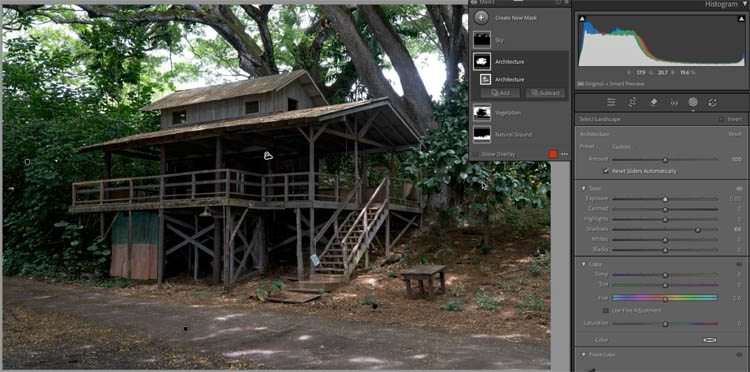
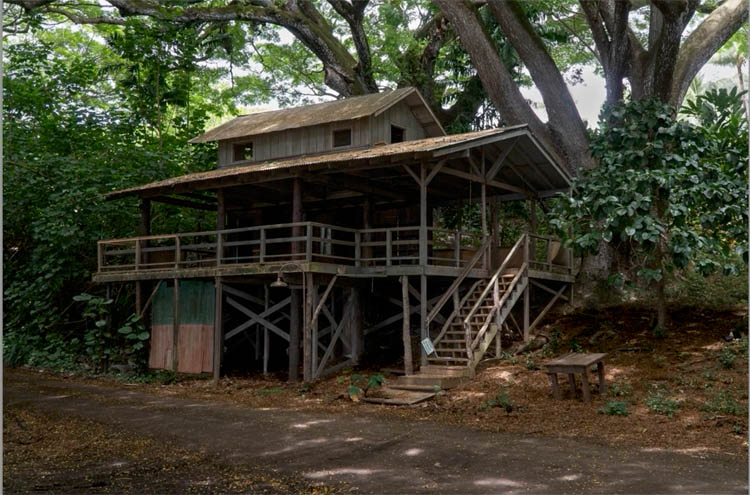
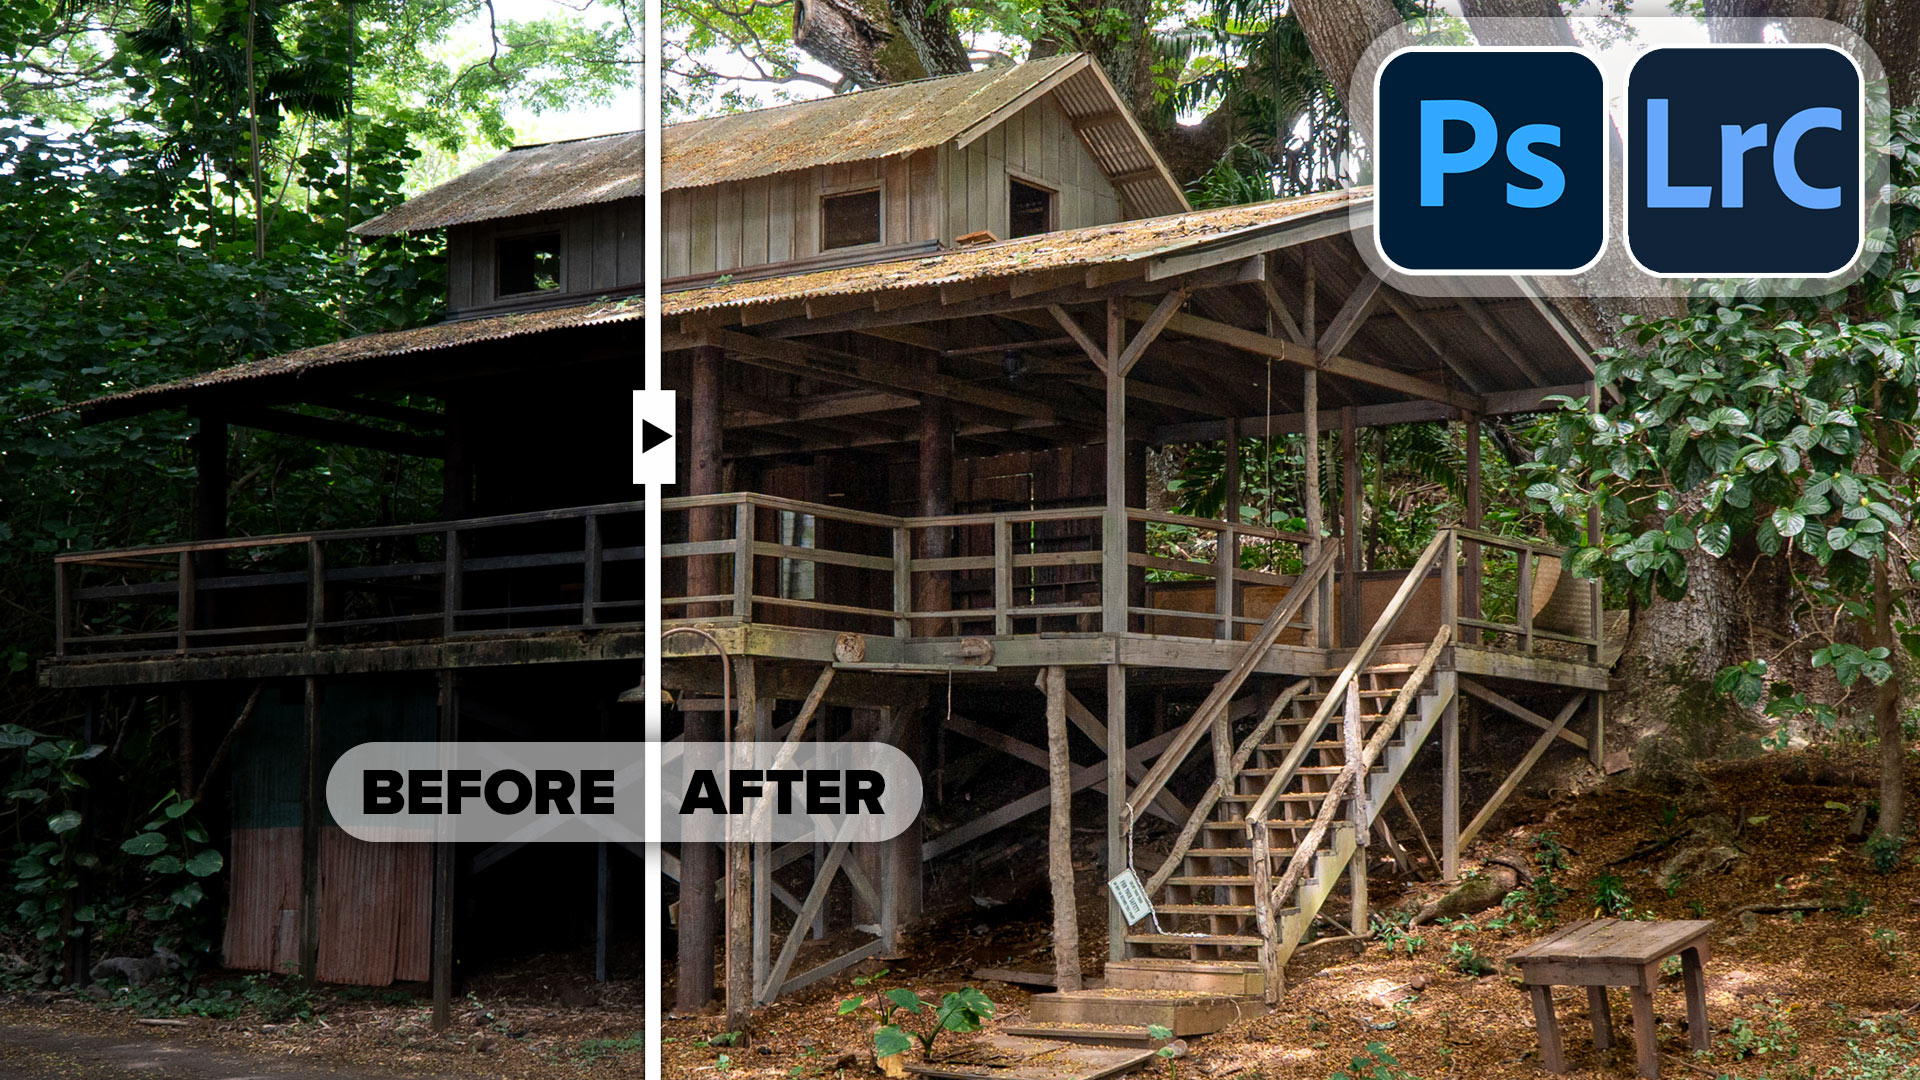
Let’s try another one. This time, it’s a shack in the jungle. This is in Hawaii.

Choose the mask icon and landscape masks.
Notice this time, different masks are available because these objects are detected in the image, namely, Architecture.
Open the shadows (move shadow slider to the right) to show the building better.
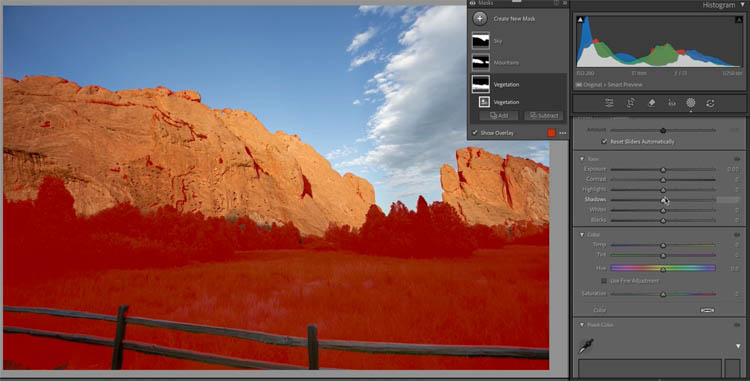
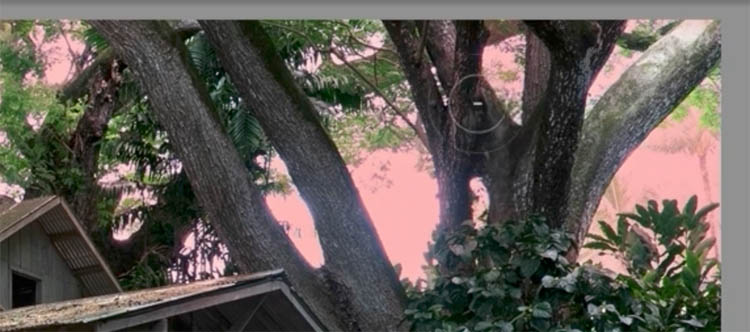
When we choose the sky mask, some of the tree branches are also included. Let’s fix that.
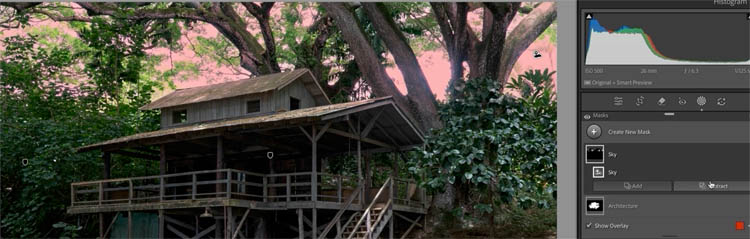
Click Subtract>Brush from the Sky mask
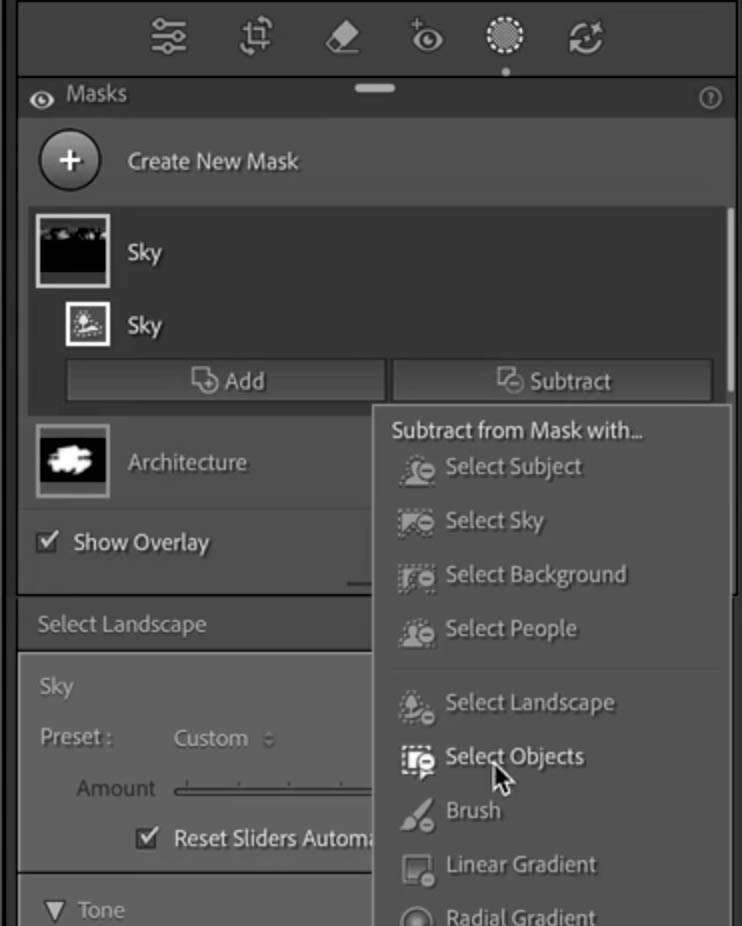
Paint over the tree to remove the mask from those areas.
Here is the image after all the adjustments. These are also all shown and explained in the video at the top of the page.
I hope you found this tutorial helpful.
Great to see you here at the CAFE
Colin
PS Don’t forget to follow us on Social Media for more tips..
(I've been posting some fun Instagram and Facebook Stories lately)
You can get my free Layer Blending modes ebook along with dozens of exclusive Photoshop Goodies here


This Photoshop tutorial shows how to make a blended background blur, the blurry background looks like the depth of field...

Free 3-part mini series: Editing aerial drone footage with Adobe Premiere Pro CC. Entire workflow from basics, speed ramp, color...

The best 25 free Photoshop tutorials (all on 1 page) for photographers editing photos in Photoshop. This list reveals the...