
How to use Blend if in Photoshop – Remove backgrounds without selections
Cut out objects in Photoshop easily without selections with blend if
Blend if, or Advanced blending is somewhat of a secret weapon in Photoshop. It’s really easy to use and it’s been in Photoshop forever. (Well, at least as long as layer styles.) In this Photoshop tutorial, you will learn how blend if works as well as how to use it on the top layer, the bottom layer and both combined. This tutorial is small excerpt from my new course on Layers in Photoshop.
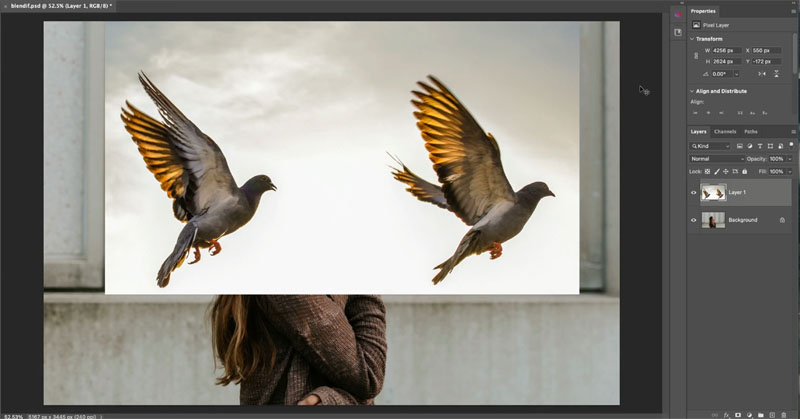
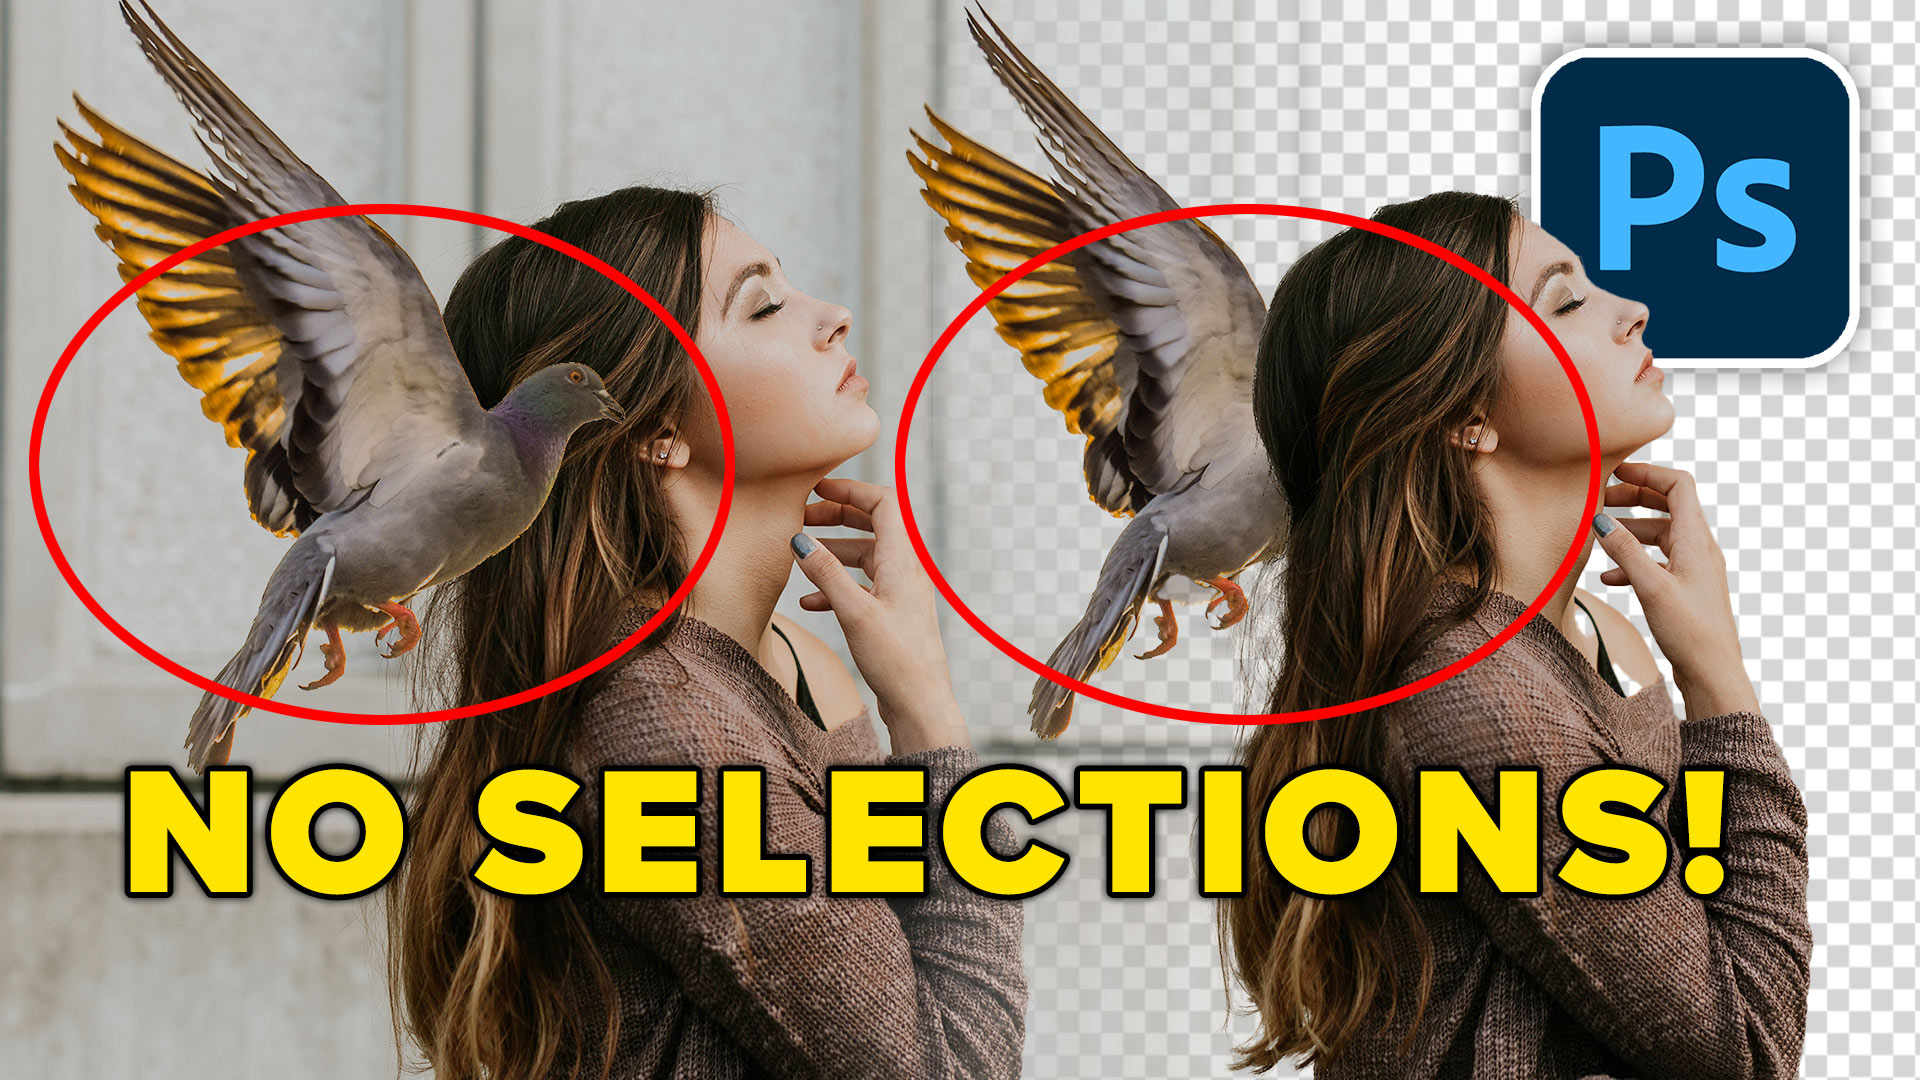
We will start with a document that has 2 layers. There is a Woman and on the second layer there are some birds. These are both flat photographs, no preparation work has been done on them.
You could use selection tools, but instead, let’s do it this way.
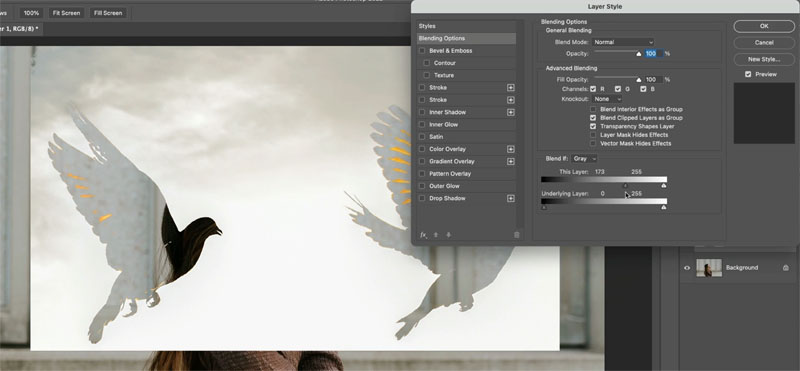
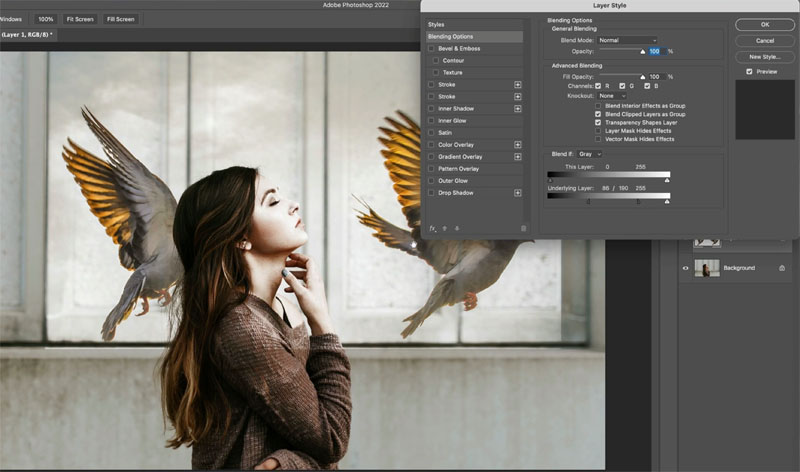
Choose new Layer style and click blending options at the top.
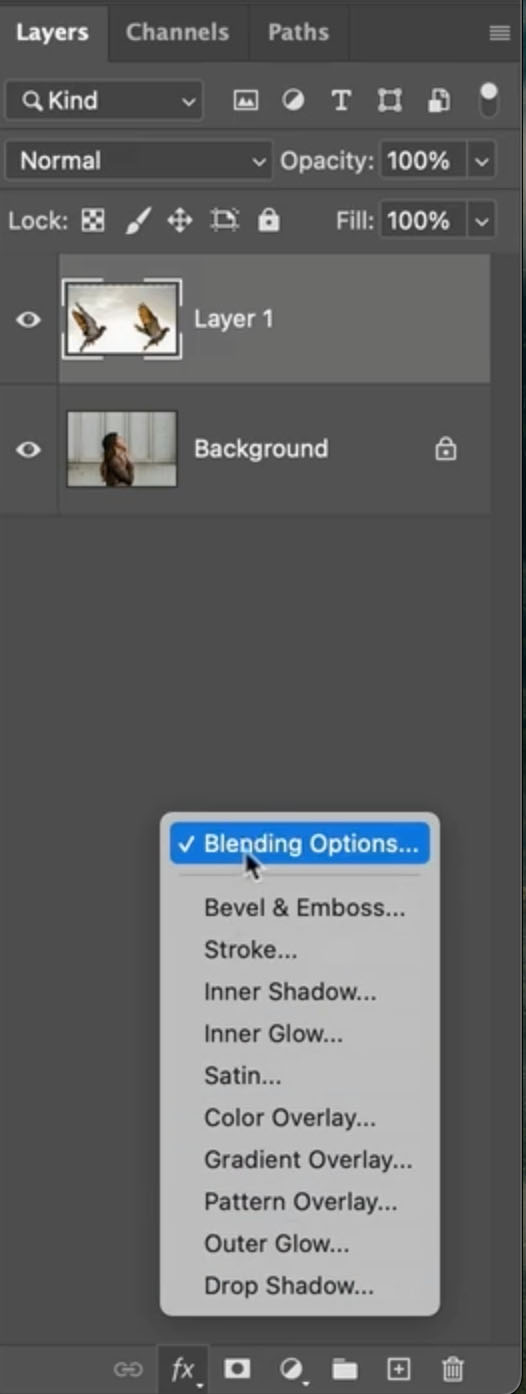
You will see the layer style box, with Blend if at the center bottom.
There are 2 layers:
This Layer: If you move the sliders, it will hide parts of the top layer
Underlying Layer: If you move these sliders, it will punch parts of the background through above the top layer.
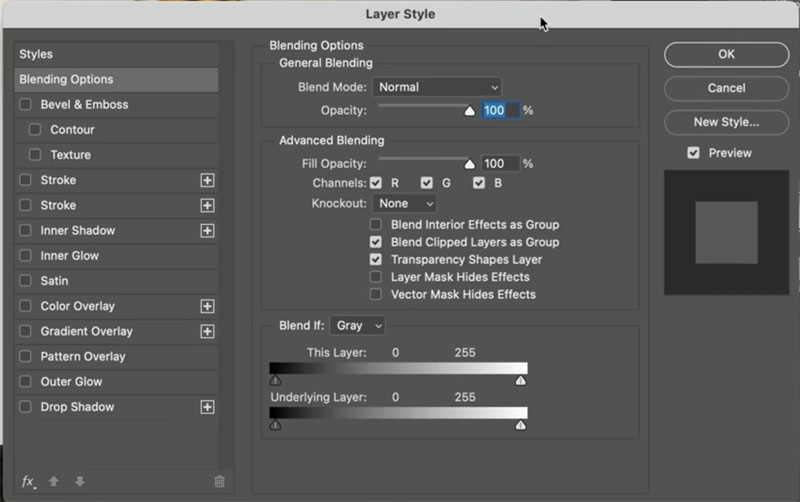
Let’s take this layer (most commonly used)
If you drag the white triangle to the left, it will hid the light tones on the top.
If you move the black slider to the right, it will hide the dark tones on top.
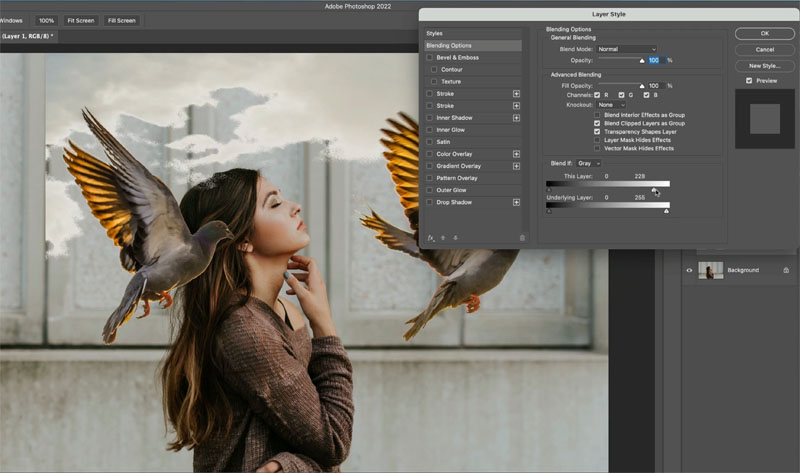
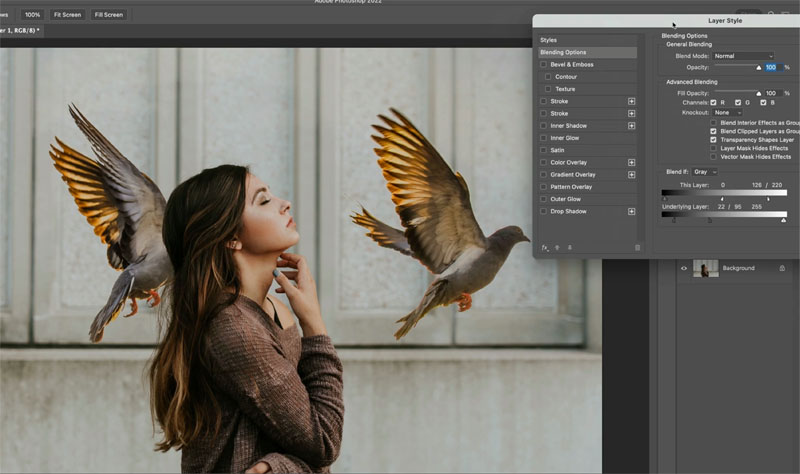
Let’s cut out the birds.
Take the white triangle on the right and drag it to the left until the background disappears.
Look at that, one quick slide and the background is gone!
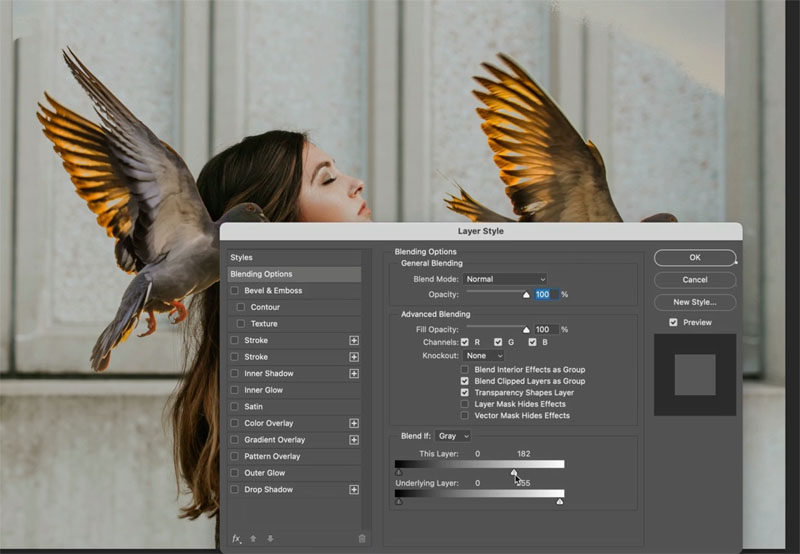
Let’s make the edge transition better.
Hold down Alt/Option and drag one side of the triangle, it splits and creates a smoother transition.
The birds are now flying in front of the woman.
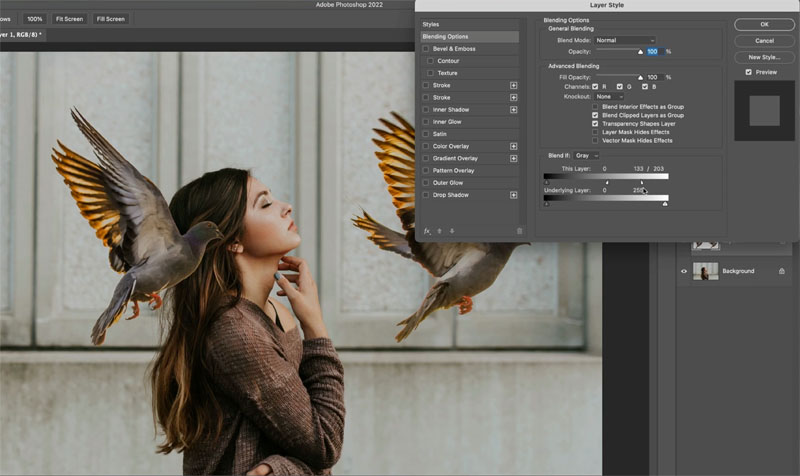
What if I want the birds to fly behind the woman, and still hide their background. Impossible without changing the layer order? Nope.
This time, take the black slider from the underlying layer and drag it to the right. Notice the darks on the woman are now above the birds. (Remember the underlaying layer punches through to the top).
Hold down the alt/Option key and split the triangle to get a much better result.
The woman is coming through now, but the background on the birds is still there a bit.
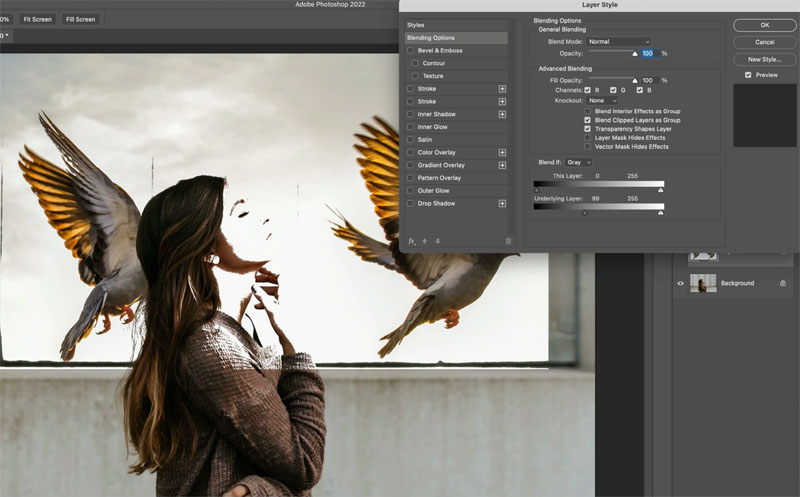
The trick is to combine the sliders
Slide the white slider from “this layer” (the top one) to the left to hide the background of the birds, like we did at the beginning. We can use both of the sliders together. I’ve heard from lots of people that they have never seen the 2 sliders use together before, but as you see it works extremely well.
And you can see the result is much better.
I hope you found this little tutorial useful.
If you liked it and you don’t yet have my Layers course, check it out here.
► Colin’s Layers Course: https://photoshopcafe.com/shop/learn_…
Thanks for joining me here at the CAFE
Colin
PS Don’t forget to follow us on Social Media for more tips.. (I've been posting some fun Instagram and Facebook Stories lately)
You can get my free Layer Blending modes ebook along with dozens of exclusive Photoshop Goodies here

13 thoughts on “How to use Blend if in Photoshop – Remove backgrounds without selections”
Leave a Reply

How to wrap text around images in Photoshop, Photoshop text wrap tutorial

New in Photoshop 2020 Object selection and new preset panels. This Photoshop tutorial shows how to easily change the color...

How to retouch a portrait photo in Lightroom or Camera RAW. This Lightroom tutorial shows how to smoothen skin, whiten...


Thanks Colin—I forget about blend-if and all the tricks to extract you shared are fantastic.
Thank you Collin. Clear and very helpful! Your a Genius!
Wow, first time that someone took the time to first show examples of two images and how you can adjust “IF” sliders. Makes more since now. Thank you!
I had quite forgotten about blendif – thank you for the reminder!
Where is the code, Colin? I don’t see it.
Thanks.
You asked if we learnt anything from the tutorial – well, as ever, you’ve made the Photoshop journey clearer, interesting and positively challenging. Very many thanks.
Thanks, Colin. Very helpful.
And you reminded me of many forgotten things!!
You are an amazing teacher and what is exceptional about your teaching is that you provide a written document along with the video. I read the written word and then watch the video–great learning–great teaching technique.
Awesome! I really enjoy “The Café” How on earth you know smooch about PS ?? You are really amazing! Thank you.
Extremely clear and informative, as ever.
Good info!
Colin, you are the ultimate Guru. Your teaching style suits my learning style perfectly. I hope you drive a Ferrari, bec ause you deserve to
Thanks Colin, Exellent