
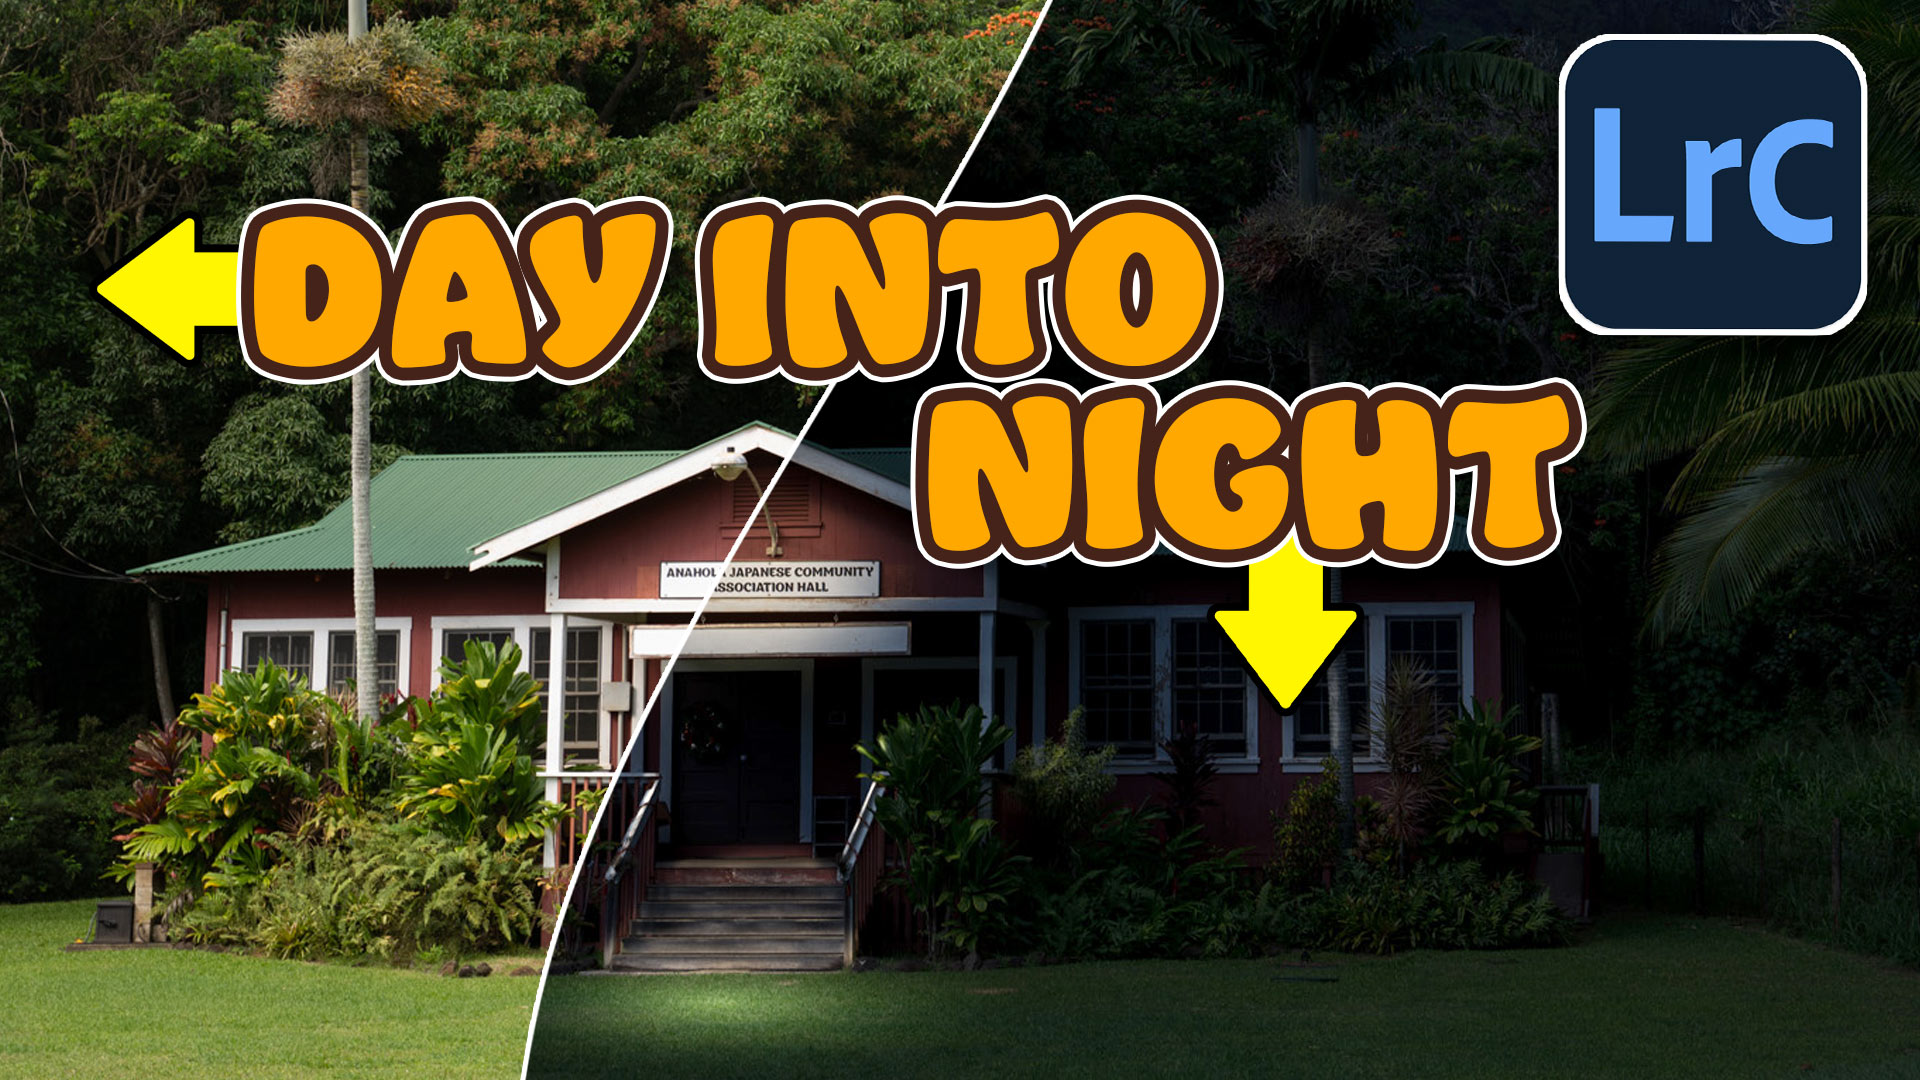
How to turn day to night in Lightroom
Day to night in Lightroom
Turning a day photo into a night photo, is fun and can be challenging. When I was in visual effects school, this was a fundamental skill everyone needed to learn and the official name is Day for Night. I have made a tutorial on day for night in Photoshop. Why not do a tutorial in Lightroom. Although, I am using Lightroom Classic, this also works the same in Lightroom. This also works the same in Adobe Camera RAW. The written steps are below, watch the video to see everything in action.
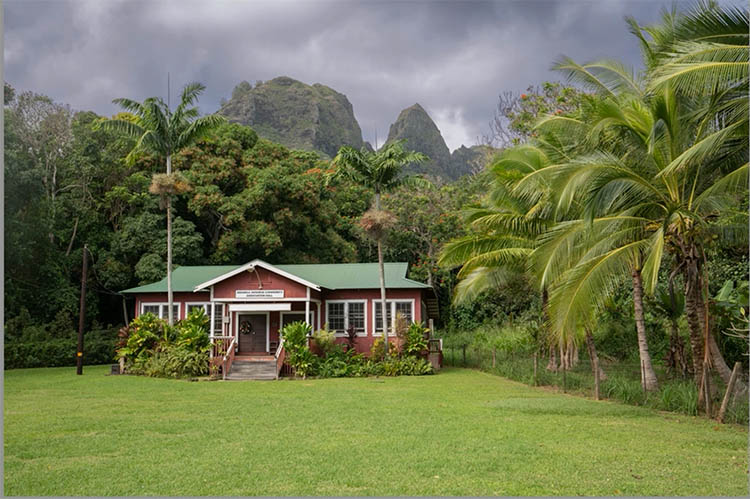
Here is the starting image, It’s a photo I captured in Kauai, Hawaii.
Changing Day to Night
The first step is to make the entire scene look like night. This is accomplished by darkening the tones and choosing a bluish hue to simulate moon lighting. You can see the settings in the develop module.
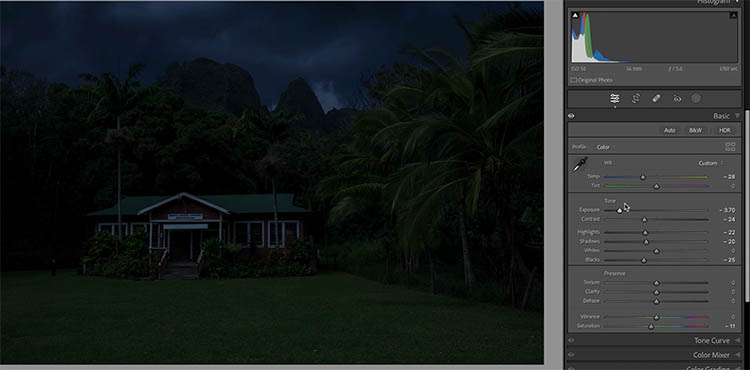
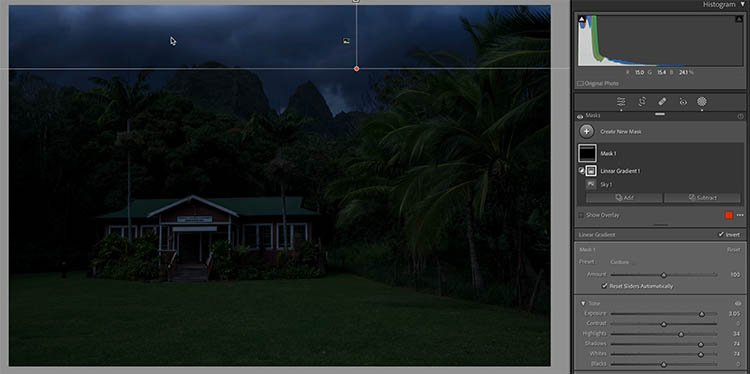
You might have a little moonlight in the scene. Using a linear gradient, add a little bit of light to the sky.
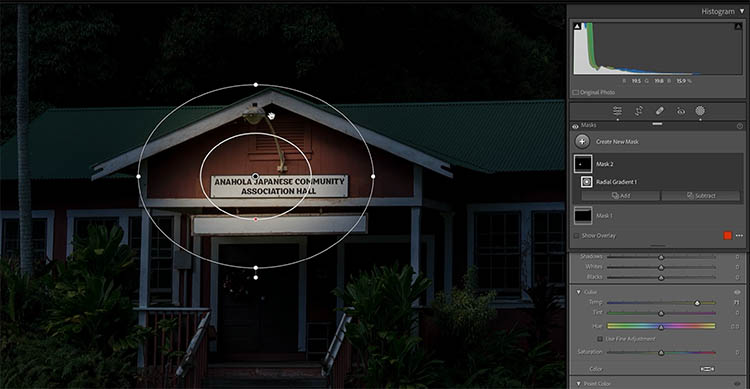
Adding artificial illumination
I see there is a light fixture in the shot. Let’s turn on this light and use it for our illumination to sell the effect of night.
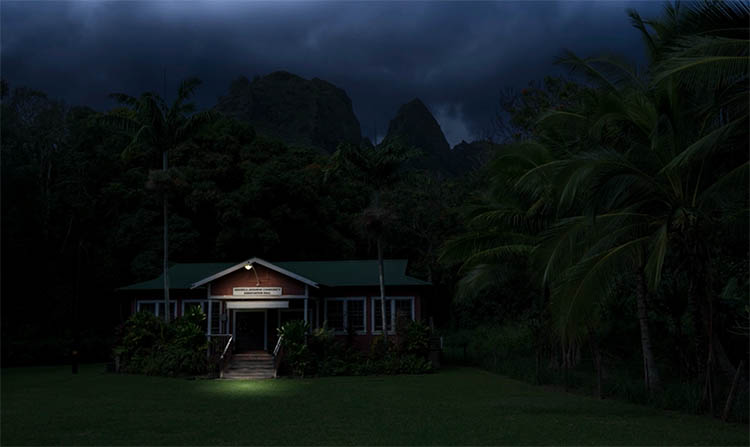
The light fixture will cast light around it.
To add that light, choose a radial gradient.
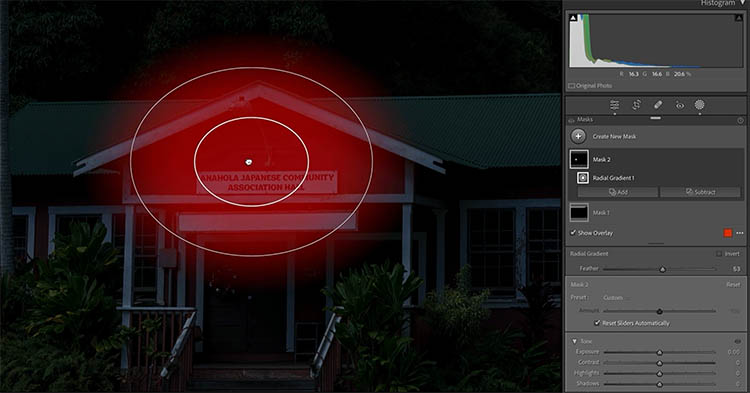
Brighten up the area under the light bulb.
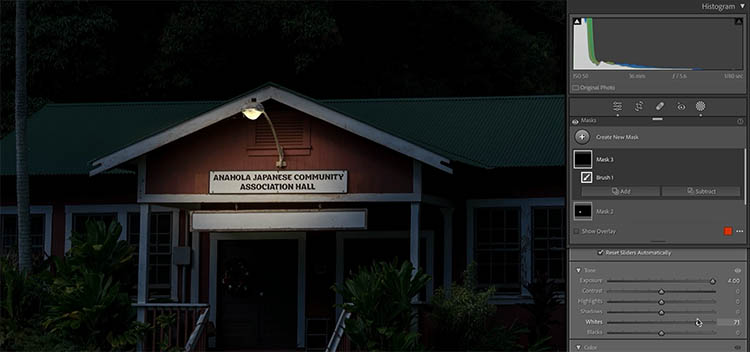
With the brush, remove from the gradient to brush away the light from areas that shouldn’t be illuminated, such as above the eves.
Add a brush and make it very bright to turn on the light.
A light bulb will create a pool of light on the ground under it.
Apply a radial gradient to add the light area. Make it heavily feathered for soft light.
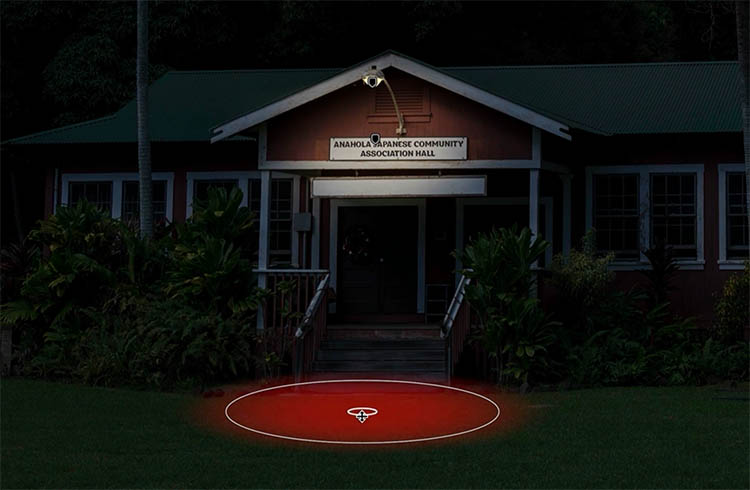
Turn up the brightness just enough, so that the ground has some nice soft pool of light.
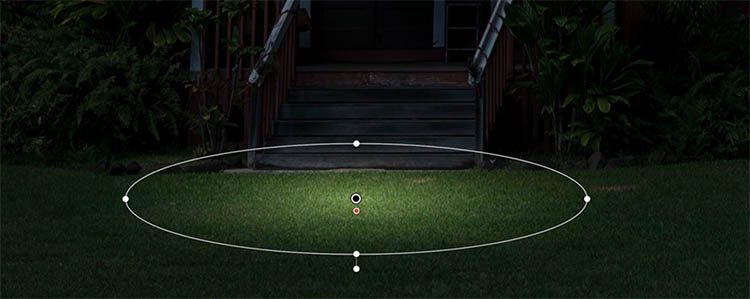
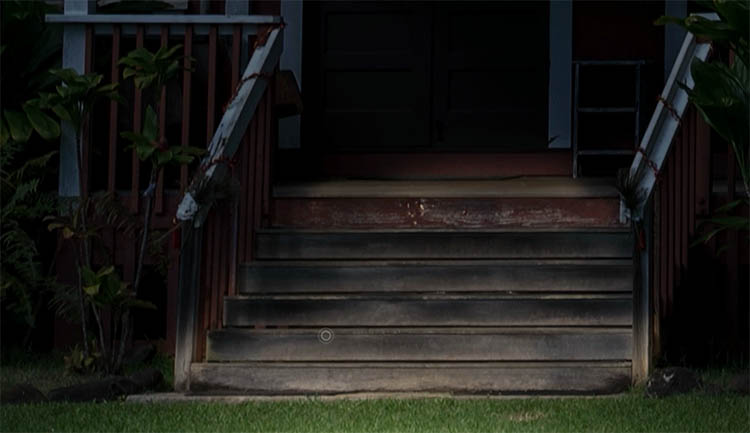
Lighting up the stairs
The stairs are directly under the light bulb and will be lit up. Using the brush, add light to the stairs.
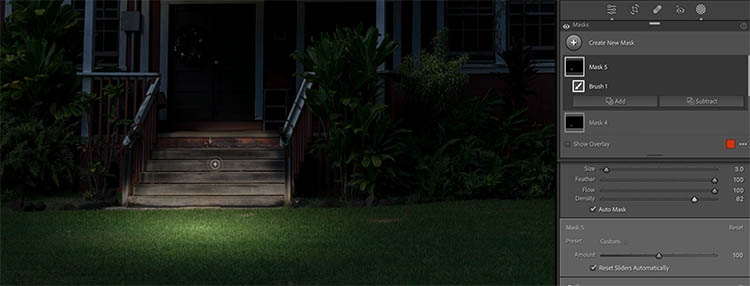
Because the light is above and behind the stairs, light wouldn’t reach the front of the stairs and there would be shadows under the overhangs.
Use a second brush and turn the brightness down. Paint shadows on the front faces of the stairs. This helps add some depth too.
Objects facing the light would get a little bit of edge light.
Using the brush with Detect edges on, paint the leaves that are facing towards the light.
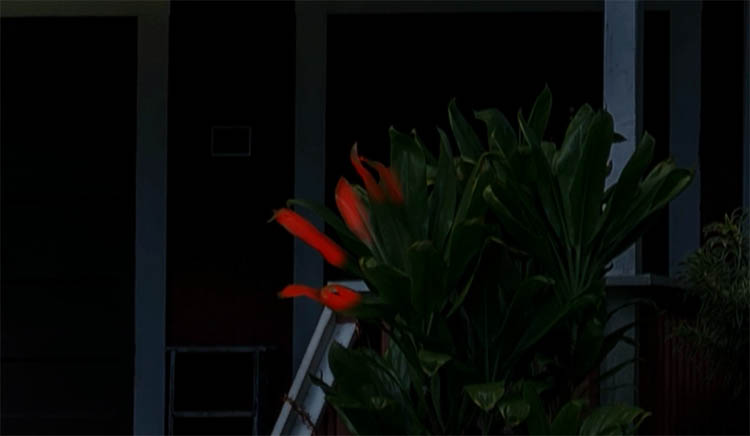
Keep adding edge lights to areas that are facing the light such as the tops of the stair rails.
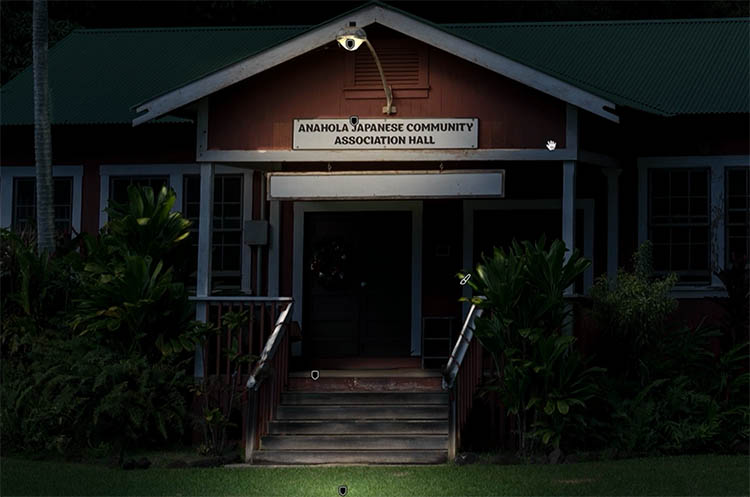
Now we have a building nestled in the jungle and mountains, at night, with a light on. You can repeat these steps if you want to light up the windows.
Even if you aren’t turning day to night, you can use parts of this tutorial for smaller tasks, such as turning on a light, or adding shadows to stairs or edge lighting to touch up your photos. I really enjoy doing this kind of work in Photoshop and Lightroom. It’s oddly relaxing.
I hope you enjoyed this! Let me know in the comments.
Colin
PS Don’t forget to follow us on Social Media for more tips..
(I've been posting some fun Instagram and Facebook Stories lately)
You can get my free Layer Blending modes ebook along with dozens of exclusive Photoshop Goodies here

5 thoughts on “How to turn day to night in Lightroom”
Leave a Reply

How to sync images and edits between Lightroom Classic and Lightroom mobile eco-system

In photoshop composites, models are shot in a different environment to the background plate used. A challenge is matching the...

One of the most popular features here at photoshopcafe is the “Super Tutorials”.In Super Tutorial #3 This will be a...


I loved this tutorial, Colin, and hope to find one of my images that I’ll try it out on. Thx as always for your excellent tutorials. I’ve learned so much from you.
Thanks for the kind words. Glad to help
Always like your videos and this one was very inspiring
Love this tutorial Colin, I’m going to try it with another photo also.
have fun with it!