
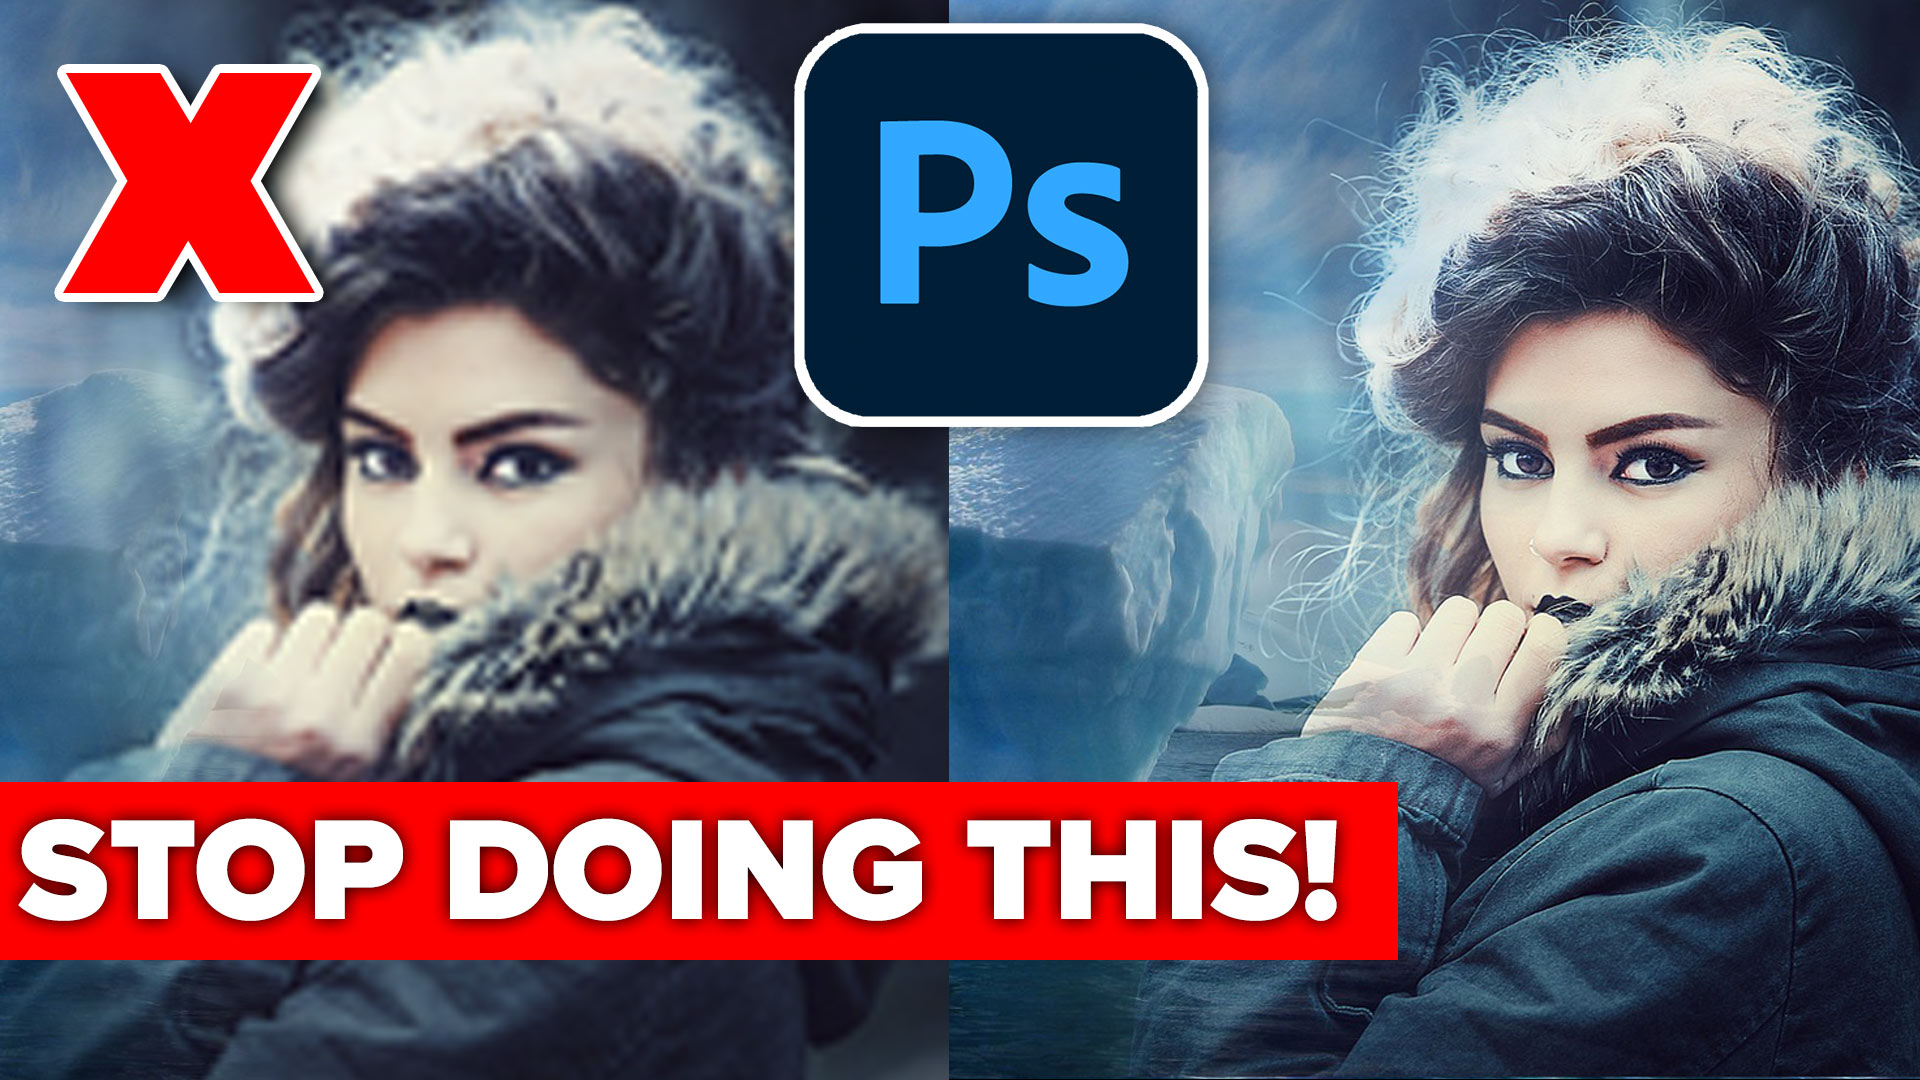
Avoid the 3 worst photo editing mistakes in Photoshop
There are a lot of ways to do things in Photoshop. Sometimes it doesn’t matter which way you do them, however there are some best practices.
There are some things, you just shouldn’t do because it will make your images look like you are a Photoshop noob. Here are 3 things to stop doing in Photoshop.
Please watch the short video above as it contains additional tips.
1. Sizzle Sharpen
Choose Filter>Sharpen>Unsharp mask to sharpen images
Sometimes, when people are too heavy handed on the sharpening, you can get white halos around the edges, that look like sizzle, because it blows the colors out. This is particularly apparent in trees.

Here is how to prevent this from happening.
Right click on the images name and choose Convert to Smart Object

When you are sharpening, usually try to keep the radius below 1.8 or so (larger amount is ok for higher resolution images and less for lower resolution).

In this case, I’ll push it higher, so we get the sizzle.
Click ok to apply

Because we have a smart object, there is a control to the right of the filter name in the layers panel.
Click the slider button
You will see blending options

Change the blend mode to Darken to hide the white. Sometimes luminosity blending mode works too,
Notice the sizzle is gone.

2. Clown color
Avoid the saturation slider, do this instead.
We want to pump up the color in these clouds, but in a realistic way.

Choose Filter>Camera RAW
Many people push the saturation slider up.
The problem is the center of the photo is over saturated and losing detail in the color.

A better approach is to use the vibrance slider.
Aren’t saturation and vibrance basically the same thing? No, they aren’t. Saturation will increase/decrease the color in an image. The Vibrance also adjusts the amount of color, but with a difference. Vibrance applys more adjustment to the areas with less saturation and and soesn’t adjust the already saturated color as much. This gives us a more even result.

3. Resolution Mismatch
I see this one all the time in composites, where parts of the image are sharp and parts are soft and pixelated.
For example, the top layer is much smaller than the main image.

If we enlarge it (I’ll show you how in a second) notice the right part of the image is softer. This is because it doesn’t have the same amount of resolution as the left side.

Lets match them better.
Start with the smaller image in bridge and right-click. Choose Open in Camera Raw.

With the image open, right-click and choose Enhance.

If it doesn’t turn on by default, click Super Resolution.
It will double the image resolution.
Click enhance.

Notice a second image has been created in the thumbnails.

Click the second image, it is double the size of the original and its name is appended with (enhanced).

Open this new, larger file into Photoshop.

To combine the 2 images, drag the first image into the tab of the second image. When the window opens, drag the cursor into the image and let go The image will be added as a new layer. See how to combine images here.

If you have 2 images of different sizes, scale the larger image down, rather than scaling the smaller one up. This way the quality will still match.
If you convert to a smart object first, it will preserve the image as you scale it.
A Smart Object, doesn’t prevent a smaller image from pixelating when you scale it up too much. But it does allow you to scale multiple times (lossless scaling) without lowering the quality, and you can revert any time.

Create a layer mask the top layer.
Grab the gradient tool and select black to white, linear gradient from the options at the top.
When you drag the gradient on the mask, you can blend the layers together.
Now they match much better because you are beginning with more similar resolutions.

I hope you found these quick tips useful. What do you consider the biggest mitakes people make it Photoshop? Let us know in the comments.
Until next week, Great to see you at the CAFE
Colin
PS Don’t forget to follow us on Social Media for more tips.. (I've been posting some fun Instagram and Facebook Stories lately)
You can get my free Layer Blending modes ebook along with dozens of exclusive Photoshop Goodies here

11 thoughts on “Avoid the 3 worst photo editing mistakes in Photoshop”
Leave a Reply
How to edit video in Photoshop. The definitive tutorial for editing video and motion graphics in Photoshop CC and CS6.

This Photoshop tutorial shows you different tools and techniques to remove anything from a photo. We will remove braces from...

How to cut out hair and fur in Photoshop in a single click. The new AI powered tools in Photoshop...


Thanks so much Colin. It is always a pleasure learning from you. I have several of your workshops from Creative Live.
Michael Breskin
Thanks, I have updated courses here at PhotoshopCAFE in case you are looking for new ones 🙂
This was a great, and very interesting post. I am very careful with Unsharp Mask, and rarely touch the Saturation slider, if I do it is very minor. The Super Resolution tutorial is brilliant. Every day is a school day with Photoshop.
Thank you, Colin.
I like all of your video helps. You say to click the “like” button, but I cannot find it. Where is the Like button? (I am on a PC if that makes any difference.)
Like button is on youtube 😉
2 of the three tips were totally brand new for me and will be helpful.
Awesome tips & reminders! Love the resolution quick re-size tip! I know about sizzle (although haven’t termed it that before – great descriptor!), but didn’t know about darken mode to hide the white. Rockin’ it as always, Colin!
The fix for the sizzle sharpen was a new one for me. Thanks!
For me the first 2 tips are excellent and will come in very handy as I am having the problems you describe.
All three tips were excellent. Thank you for posting these fixes.
Only one I’m guilty of was the third one, it’s nice to see how to fix it.
Thx