
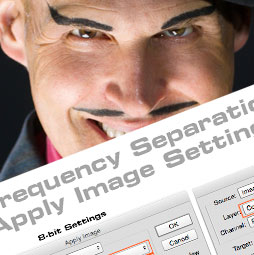
Frequency Separation retouching tutorial in Photoshop
By Dave Montizambert
You know, I love photographing people. I love sculpting subjects with light then working with them to bring out their best and finally when all is right, immortalizing them into pixels. Invariably no matter how much I put into lighting, they almost always need some retouching. Now I absolutely love retouching in Photoshop, but it’s not something I want to spend the whole day on, and that is easy enough to do. Also I love making money, I like making lots of money, so if I could shoot and retouch many more faces in a day, I’d become inconsolably happier than I already am – if such a thing is possible. So what follows is one of the techniques I use to stream-line facial retouching without compromising quality for speed. This technique is called “Frequency Separation”. Frequency Separation sounds like a mental condition audiophiles might battle after too much time away from their stereos, but happily for them and myself it is not.
Frequency Separation allows retouchers to separate the high frequency pixel information from the low frequency pixel information in images and make edits to them separately, in other words you can work on texture and detail independently from colour and tone and vice versa making most day to day retouching so much easier. When you think about, when someone has a wrinkle, if you fully remove that wrinkle with the Clone tool or one of the Healing tools, they start to look artificial, they start to look like they are made out of plastic. I don’t like that look, I want my subjects to look real, but I still like to tone down the wrinkles and remove temporary imperfections so that they do not distract the viewer. As master retoucher Robb Carr says, “It’s about reducing the distractions so that we can get to the essence of the person”.
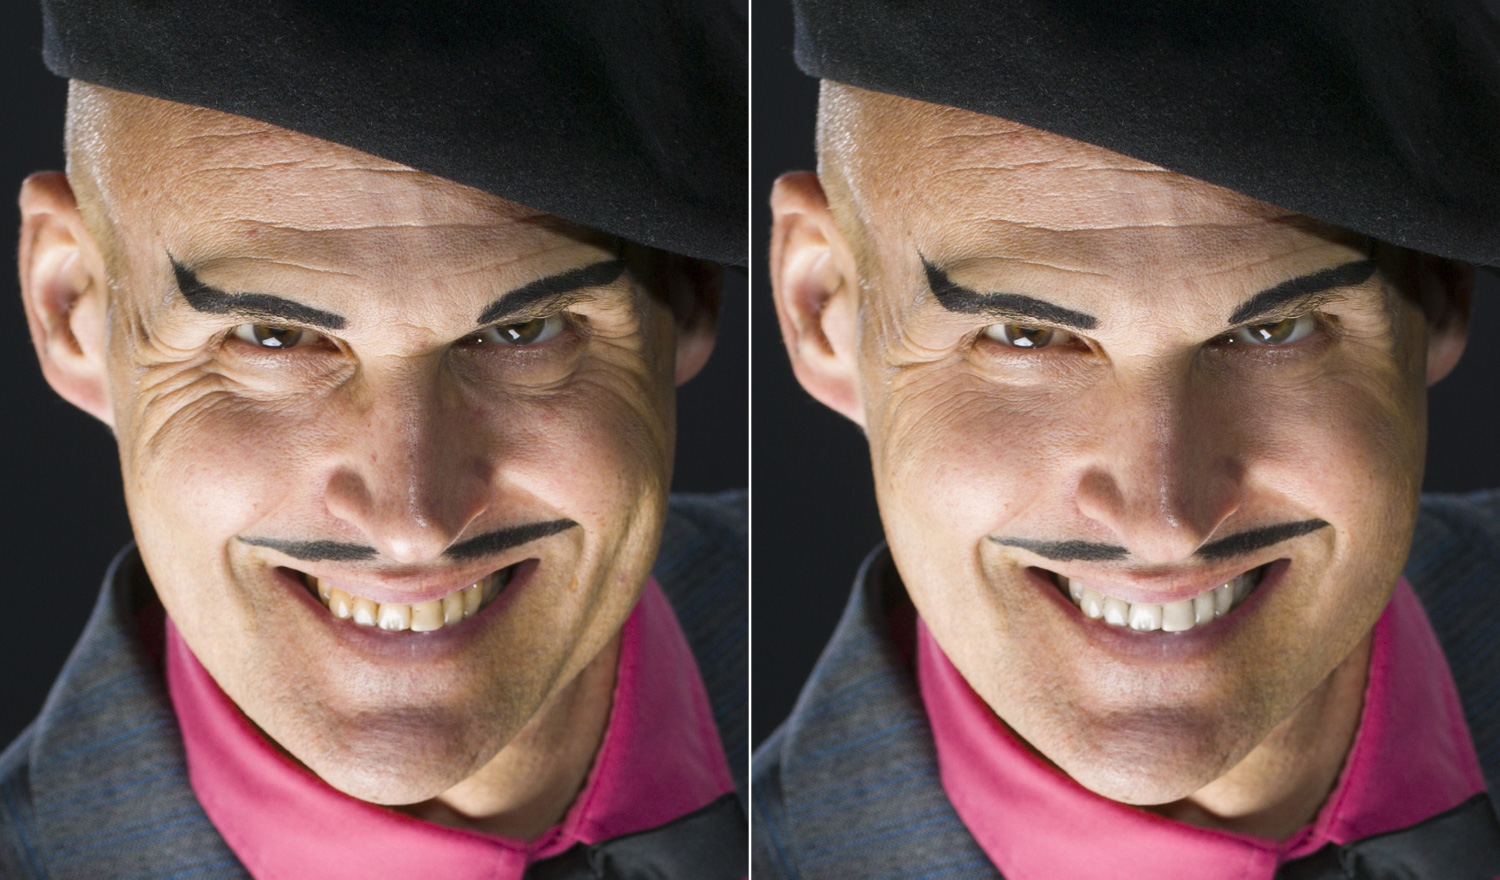
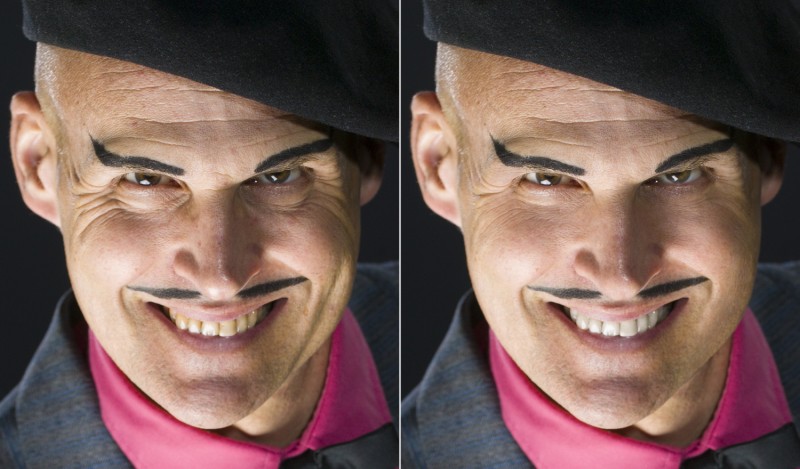
Frequency Separation is a tremendous aid with this, if for instance I’m dealing with a deep wrinkle (see Image_02), Frequency Separation allows me to go in and keep some texture and detail for authenticity, while reducing the toning that makes that wrinkle look so deep and distracting.
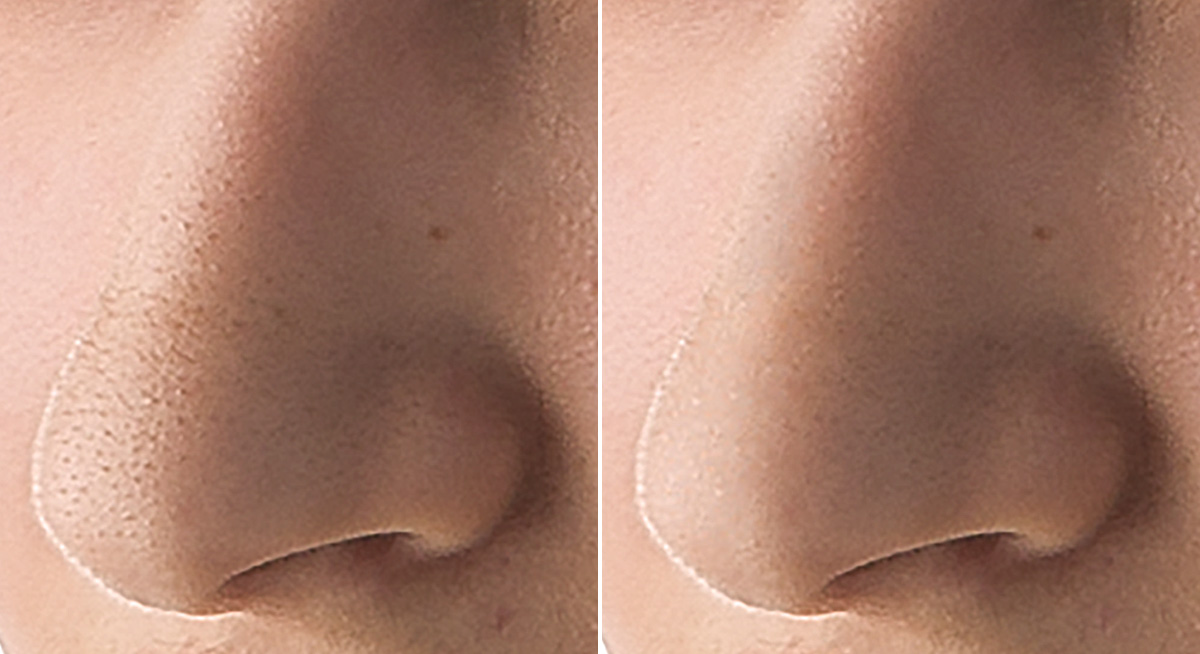
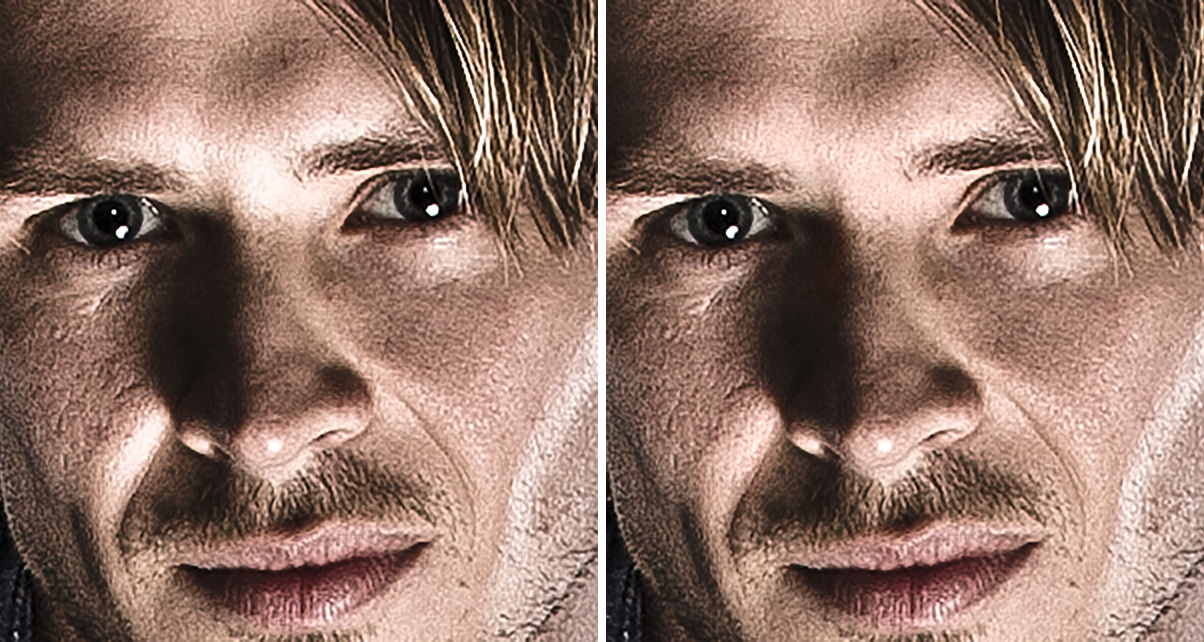
Or I can completely remove black-heads from a nose by wiping over the affected area with the clone tool, removing just these blemishes (see see Image_03) without messing with the colour and tone. Or I can seamlessly put detail back into a burned out area in seconds (see see Image_04).
To unlock the magic of Frequency Separation you need to geek out for a bit and follow my recipe below.
Step 1
With an image file open in Photoshop duplicate the background layer by typing Cmd/Ctrl-J
Name this duplicate layer “Detail & Texture”, this will be the top layer of the layer stack – the high frequency layer – click on this layer’s visibility eyeball to temporarily turn its visibility off.

step 2
Rename the Background layer to “Colour & Tone”, this will be the low frequency layer.
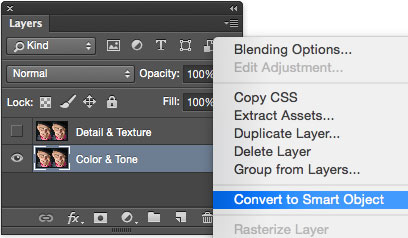
Right click on the Colour & Tone layer and select “Convert to Smart Object”.
step 3
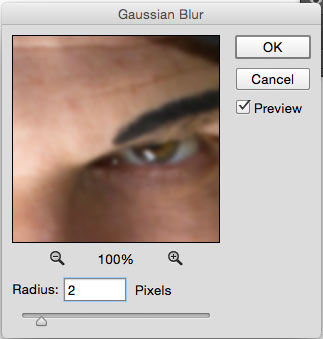
With the Colour & Tone bottom layer still selected, go to the Filter menu and select: Blur > Guassian Blur > Radius: 2.0 pixels (that’s the amount I like to use). The result you are looking for is a radius that lightly blurs all the fine detail.
step 4
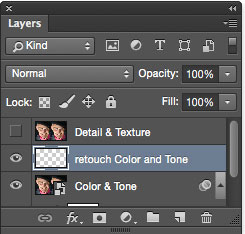
Type Cmd/Ctrl-Shift-N to create a blank new layer above the bottom layer, name it “Retouch Colour & Tone”.
step 5
Select the Detail & Texture layer (the top layer) and click on its visibility eyeball to turn on its visibility.
From Image menu select “Apply Image…”.
In the resulting Apply Image window, make the appropriate settings for an 8 bit image or a 16 bit image

step6
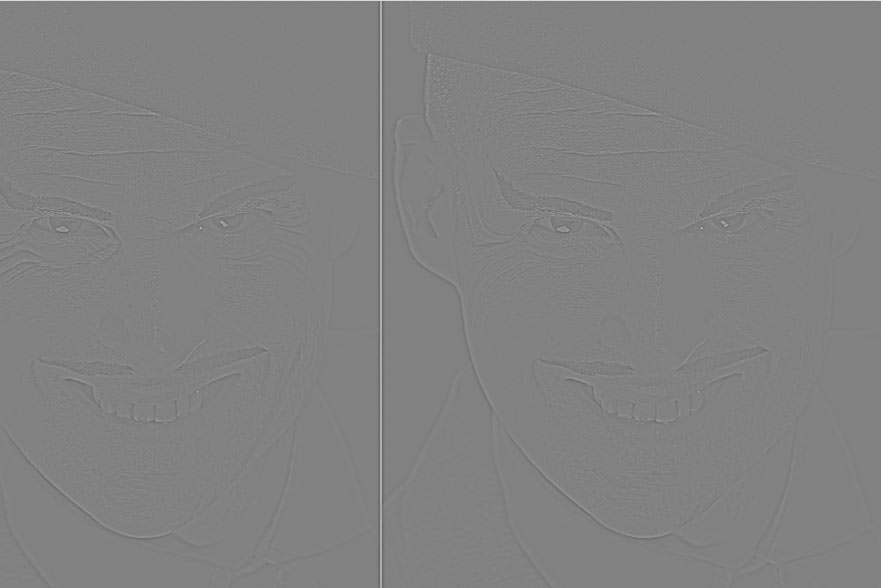
Click the “OK” button to apply the “Apply Image” settings to your image, you now have detail & texture separate from colour and tone, although the image now looks like a weird grey line drawing.
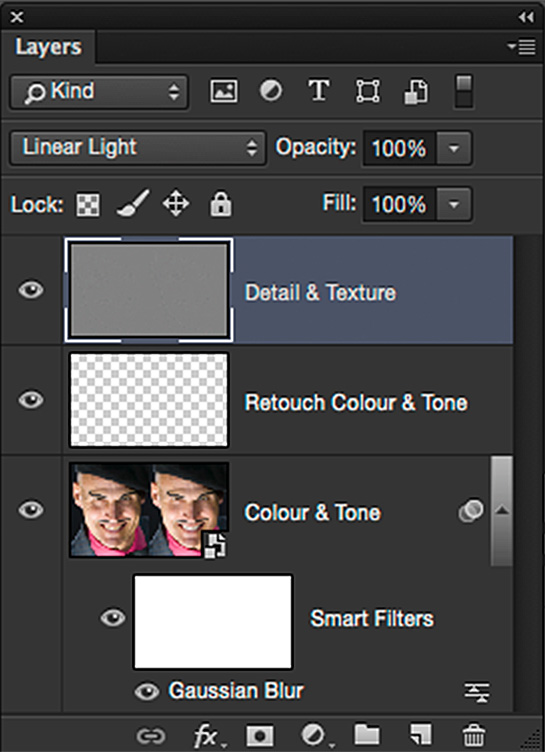
With the Detail and Texture layer still selected, go to the top left corner of the Layers Palette then click on the Blend Mode field (which by default reads Normal) and set it to to “Linear Light”. Notice how your weird grey image now looks normal again, only now it is sharp again. This is what the final layer stack should look like.
Retouching on the separated layers
The next step is to smooth the subject’s skin-tone, i.e. make wrinkles less dark and so less noticeable, or tone down “glare” areas.
Now Frequency Separation is set and ready to be brushed over the subject to smooth and tone the skin reducing roughness, making wrinkles less dark and less noticeable, plus toning down “glare” areas. Here’s how I like to do it:
step 7 – Low Frequency. Color and tone
Select the “Retouch Colour & Tone” layer then brush over wrinkles and blotches with the Healing Brush tool, or the Clone Stamp tool. Make sure to set the “Sample:” field in the Tools’ Option Bar at the top of the open window to “Current & Below” so as to not select any pixel information from the top layer

step 8 – High Frequency. Fine details
Select the “Detail and Texture” layer.
It’s very important to set the “Sample:” field in the Tools’ Option Bar at the top of the open window to “Current ”.
![]()
Remove unwanted sharp detail like blackheads and rough skin texture, or use this layer to seamlessly clone detail back into burned out areas, using the Clone Stamp Tool set to 100% Opacity and Flow.
Wrap up
Now I hope the recipe above didn’t make your head ache trying to follow it, I know I got lost several times while proof reading the above and I wrote it! The problem here is trying to learn visual concepts from written word, actually seeing it demonstrated first hand or better still in a video, which you can play it over and over again, makes comprehension so much easier. To avoid “Frequency Separation Frustration”, I suggest that you apply the steps of this recipe to an image while reading it, this will make it much easier to understand, and I also suggest that you should record the steps listed above as an Action so you never ever have to do them ever ever again!
xtra Credit
 To make learning Frequency Separation and general facial retouching much easier and to delve more deeply into the subject than space for this article allows, I have created a DVD tutorial (also available as a digital download) called High-Speed Facial Retouching . This absolutely incredible 🙂 set of retouching video tutorials shows you, in painstaking detail, everything you need to know to master Frequency Separation including how to use it with 8 bit images as well as 16 bit images. This DVD also includes a ready-to-go Photoshop Action for Frequency Separation retouching and has not one but two versions: one for 8 bit images and one for 16 bit images (I use different “Apply Image” settings when working with 16 bit files). The great thing about the Action is you open an image, run the Action, decide what areas of your image need retouching help, select which layer (the Colour and Tone or the Detail and Texture layer) best suits that retouching situation, decide whether to start with the Healing Brush Tool, the Clone Stamp Tool, or the Spot Healing tool, then brush over the afflicted areas, and a short while later you are on the beach sipping mai tai’s with all the time you have saved.

PS Don’t forget to follow us on Social Media for more tips.. (I've been posting some fun Instagram and Facebook Stories lately)
You can get my free Layer Blending modes ebook along with dozens of exclusive Photoshop Goodies here

18 thoughts on “Frequency Separation retouching tutorial in Photoshop”
Leave a Reply
Complete guide on the Adjustment Brush in ACR and Lightroom to make precise local edits.

This Photoshop tutorial shows you how to wrap a texture to a photo of a face and make it look...
3 big features of Generative Remove in Lightroom and ACR ai.


To be honest, a long details about image retouching. Very helpful post.
i am providing retouching but your tutorial is so helpful to me thanks.
Hi every time I use the spot healing tool on the retouch color and tone layer I don’t get anything and I can’t select the sample layers either… can you help with that… plus what do I do at the end when I finish editing do I merge all layers?? Thanks
In the end I save it as a PSD, I’ll create jpgs for sharing.
A rapid Skin Retouching Tutorial in Adobe Photoshop.
very nice article it is very helpful. great collection and a lot of good inspiration for getting better final results 🙂 Helped me getting even more beautiful shots. Thanks for sharing!
Good and detailed review, Dave! Thanks!
I’m not getting any results on the texture layer, why is this happening? Thanks.
Look at the steps again, you probably missed something like choosing the correct layer in apply image
This tutorial is a lifesaver. Thanks for sharing
Hi. How can I create a new layer in which I could use spot or healthy spot patch for background layer. I mean, how to make many new layers to do separate parts of retouching?
Just make a new layer and choose “use all layers” at the top
Hi nice tutorial , good guide ..just a question -& a request in both . 16 bit is seoerately for raw images ?? Also I wanted a tutorial to adjust the brush tool , mix brush and settings like flow, opacity , wet or normal brush etc
Thank you for this good tutorial. Works well for me. It is a real time saver.
Thank you, very useful article. However, I’ve got a question. I tried this technique but since I wanted to act non destructively also for the texture layer, I created an empty layer where I made my corrections with the healing brush and clone stamp tools with the sample option set to “current and below”. I’m satisfied with the result so I wanted to ask you… Why is the “current” option so important? Was my procedure that bad? Thank you.
Thank you for this good tutorial. Works well for me. It is a real time saver.
Honestly it really helped me 😍… I really need to learn more on this
Thank you for this detailed tutorial on frequency separation! I always struggled with achieving that perfect skin texture, but your step-by-step approach made it so much clearer. The tips on blending modes were particularly useful. Can’t wait to try this out on my next project!