Much of my interest and therefore my work in Photoshop deals with beveled effects in one form or another. I love to watch an image jump off the page as styles are applied, taking on a form of realism that I’m incapable of in the real world. I can’t make a ball with playdough, let alone sculpt anything resembling art. Well, my blobs might be considered modern art… some people get paid way too much for far too little. This is, of course, just my opinion. Give me Charlie Russell any day…now that’s art!
Nearly anyone can create a bevel on type, but not many realize that from this foundation we can create glass, plastic, metal, or something that looks out of this world. I’ve talked about this before in other articles, but the variations are such that I could hit this topic a hundred times and not come close to doing it partial justice. So, for this column/tutorial I’m going to again tackle an effect on a type selection… I’m not sure what yet, as creation from scratch is half the fun.
To preface this, I’ve set my Actions Palette up to record everything, so you may download the Action to see for yourself exactly what I did.
Let’s start with a new image with a white background. For this tutorial my image size is 9inx5in, 200 dpi, RGB with a white background. Create a new layer and, with the type mask tool, enter your type selection. Fill this with 50% gray.
Now apply a bevel. You will see my settings in the image below:
Here’s the result thus far:


You should note that I’ve changed the Shadow mode to ‘Screen’ and applied a light blue.  The default is black, which is fine for a simple bevel effect with a shadow, but I want to work with some lighter variations for a glassy or plastic effect.
Now let’s give this a little color. I’m a huge fan of the Layer Styles stroke command, especially using the gradient stroke. Let’s apply the Blue-Yellow-Blue stroke to the inside of our type, with the following settings:
Here’s my image:


Ok, it seems a bit faint, but I did that for a reason which you will hopefully see shortly.
Duplicate the active layer, and set it to Overlay mode.
Create a new layer beneath the duplicate, go back to the duplicate and merge down (Command/Control+[). Next, I’m applying the plastic wrap filter to both layers. Now I’m creating a new layer above the background layer. I’ve set my foreground color to white, background to blue, and with the reflected gradient selected, I’m filling the new layer from the center to the bottom of the text.
Want to bring out the plastic wrap effect? It is a bit difficult to see right now, so select the topmost layer and adjust the contrast, moving the slider to the right. See that plastic ripple right out of the image?
The colors I’ve selected are a bit hard to see with a white background, so I’m going to deselect my type and fill the background with, you guessed it, black.
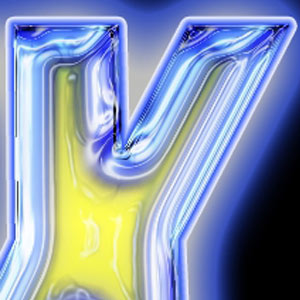
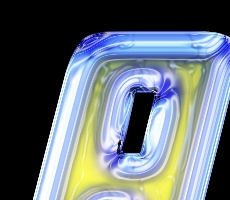
There… that stands out a bit better! Now on all my layers I’m going to mess with the contours, applying the ‘ring contour’ to each beveled layer. Here’s my image:
Maybe you don’t like the color, and I don’t blame you. The point is to see what you can achieve with a little tweaking of the lighting and bevels. Another technique that is invaluable is the use of overlay layers and opacity adjustments. Try running filters on the different layers… you will be surprised with the results!
To finish this up I’m just going to dress things up a bit by applying softer edge. I’ll do this by applying an outer stroke to my bottom layer and an outer glow. For both the stroke and glow I’m using a gradient using my White/Blue combination. Here’s the result…

I hope this was informative and helpful. Please use the Action as you like, but definitely view it in Edit mode to see all the steps play out. This in itself is a great learning tool.
Al Ward, Action Fx Photoshop Actions Resource
Get in-the-know!
Access valuable Photoshop extras and goodies for free and much more a

This site uses Akismet to reduce spam. Learn how your comment data is processed.
How to unlock features, extend and automate Photoshop with scripts. This tutorial shows how to download, install and run scripts...

How to add a background blur to a Photo in Photoshop. Learn to make a blur mask / depth map...
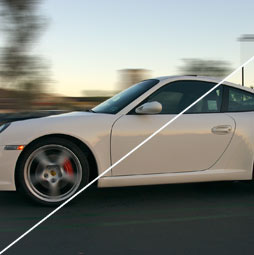
In this tutorial, we are going to take a picture of a car and make it look like its driving...


wow nice and beautiful and informative things you have shared.