Here is a tutorial on easily and quickly making a 3D can in Photoshop CC or CS6.
There are a number of 3D objects already built into Photoshop. Learn how to access them and how to apply your own designs to the labels. You really don’t need a ton of artistic talent to accomplish this effect.
In the Wolfbear example, I used some splash brushes to add the water effect to the cans. If I get enough requests, Ill make a tutorial on that part too.
Thank for watching!
See you next week with a new tutorial
Colin
Make a 3D Can in Photoshop in Seconds
Hey Cafe Crew, it’s Colin Smith here from PhotoshopCAFE and you can find me on Twitter, Instagram and Facebook at PhotoshopCAFE.
Today I’m going to show you how to create a 3D can and apply your own design to it right here inside of Photoshop, and it’s super easy.
So what we can do is we can actually begin with either our image or we can begin with our can. It doesn’t really matter how we start.
What I’m going to do is I’m just going to take an image I’ve already created here from Photoshop. I’m just going to drag that in there as a new layer; now that’s from my library panel. You could create your own design right here, make sure you flatten it into one layer first before you do this.
And then, what we’re going to do is we’re going to choose 3D, under 3D, New Mesh from Layer and you’ll see under the mesh presets, all these 3D models exist already in Photoshop.
And while we’ve got our layer selected, if I choose a soda, it’s actually going to apply this as the texture. So, let’s click on the soda. It’s going to create a can.
Now, this will give us an option to go to the 3D workspace. It doesn’t change everything works, but what it does is it gives you the better panels for working in 3D, so click Yes. And notice what itís done right there is its actually just gone ahead and applied our label right there into the can.
Now, there’s a number of things we can do. The first thing we can do is we can change the image or we can edit the image. And let me show you because maybe you’ve started without an image or maybe you want to edit this image. Either way, what we’re going to do is you’ll notice the different panels here. What you want to do is go to the 3D panel and you’ll see one that says Label Material.
If we turn that on and off, you’ll see right there, this is our label right there. That’s our image being wrapped around that can. So we’re going to do all our adjustments here under Properties, and this is going to be under the Diffused menu. So if we choose Edit Texture, it’s going to open this as a new document and a smart object.
And now, I could edit this and it’s going to update the texture. So why don’t we give it a colored background. So let’s grab our Layers panel here and make sure our Layers panel is selected here and I’m going to create a new layer underneath. And let’s just fill it with–I don’t know–maybe that orange color.
So I’m just going to click here and we’ll just grab a similar orange as that, so we’ll just grab the Eyedropper Tool and sample that orange there from the image, and notice that sets our foreground color. Now, if we hit the Alt Backspace or Option Delete, that will fill it with that orange color.
Now, I noticed that this is a little bit on the edge. I don’t want that there. Just shove it over a little bit. Hit Enter, there we go, nice. So, all I did is grab the [inaudible 00:02:44] Tool and just moved that over. And if I hit the Save, that’s just Ctrl or Command S, it will update there. And notice we’ve got that orange right there on the can.
Now, we can also change other things on here. So, if we go under this Diffuse and you’ll see Edit UV Properties, this is where we can actually change the scale of this. So, you know, if we want to make it larger or smaller, you know things get stretched or whatever, you can fix it right there.
The other thing we can do is the vertical scale, so we can make this– Notice as we bring it down it will just repeat it, or we can pull it all the way up there. Let’s make that a little bit bigger. Now, notice it’s a little big, we can’t see it, but we can also change the offset here. So, if you’ll look at the offset, we can rotate it around or we can bring it up and down, so there we go. That’s how you would make that fit.
So, obviously, it’s a little big. Let’s take that down a little bit. Maybe we’ll type in–I don’t know–120, and then we’ll just slide it up. Here we go. So, notice how you can kind of change the way that maps on there. Now I just want to set this back to 100 because it looks a little weird there and just click OK.
And at this point, you know, we can click away here and we can just rotate our whole scene like that. And, notice here, let’s get it from a nice angle like looking up at it; nice, big and powerful. Now, if you’ll notice there, that’s our Light, so if we click on that, we can actually just move this around.
We can relight this scene. Notice that just by simply dragging, we can position where our lighting is. See that we can have it coming from up or we can have it coming from there. All right, now, there’s another way of doing that is if we hit the Shift key and grab the shadow, we can actually do it that way too.
So, if we were to, maybe, click back on it, so maybe let’s just get back to our environment there, let’s just go back to our Scene, and then let’s just drag down, and notice that. So let me show you again, if we hit the Shift key and once we go into the Lighting, so let’s click on the Lighting, hit the Shift key and drag that shadow around; notice that.
So we can drag the shadow to reposition our lighting. That’s another way of doing it or you can grab that little point there and move that around. You can also change the color of the light if you want to give it a little bit of a warmer color, we can do that right there. You don’t want to go very far. Notice it’s pretty subtle.
And, also, the shadow at the bottom there, we can turn that off, we can turn it on or we could soften that shadow by dragging; notice that. And we can also change the intensity of that lighting; make it really strong or very dim.
All right, and when you’re done, hit Ctrl Option, you know, just all the keys, the three modified keys and then hit the “R” key, and what that will do is it will render it. And once it starts to render, it’s going to start to look a lot better.
So, anyway, so that’s just some basic things you can do with the 3D right there inside of Photoshop. I hope you guys enjoyed this. If you did, become part of the Cafe Crew, hit that Subscribe button right now and you’ll get a new tutorial at least once a week. Also, take that Like button and smash it into dust. Add a comment and until next time, I’ll see you at the Cafe.

This site uses Akismet to reduce spam. Learn how your comment data is processed.

New Features in Lightroom 8 / Lightroom Classic CC 2019 This video goes through the new features in the latest...
How to make a personalized watermark in Lightroom tutorial. Watermarks can be images or text, create once and reuse to...
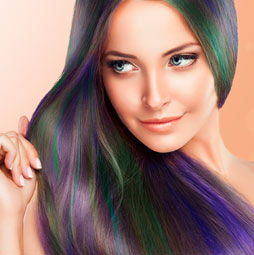
How to change hair color in Photoshop. This easy tutorial shows you how t change hair color to blond, black,...


great job… thanks
Perfect timing on this one – I see you posted this in 2017 – better late than never! LOL I’m working on a brand presentation and needed to add product just like this. Thanks for this one! You’re the best! I CAN do this!