When you are shooting with a good camera and lens and the aperture is wide open, you can create a nice depth of field effect. This is used in portraiture photography. You know the look, it’s that prized, soft, out of focus background with the nice sharp subject. Then there are lights in the background, they turn into little sound disks, called light Bokeh (bo-kah). This is easily achieved in camera, if you have good enough gear. If you don’t have a nice DSLR camera, or you have an existing photography that you want to add production value, this tutorial will show you how to achieve this soft/out of focus effect in photoshop.
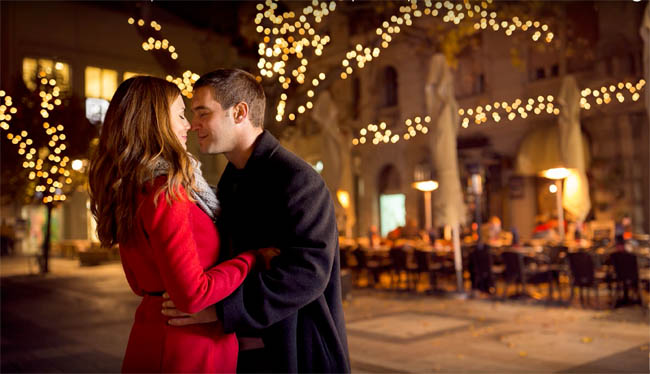
I’m going to show you how to create that soft dreamy background with this photograph. We have some of these little circles going on which is known as bokeh, but I’m going to make it much more pronounced and much more romantic. This is the kind of thing that usually would be achieved by using a very shallow depth of field and a very wide open aperture on the camera.
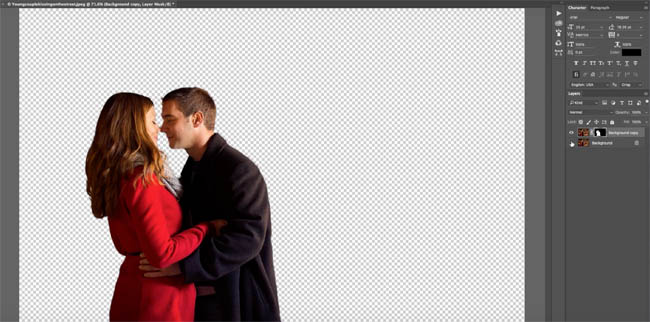
The first thing we’re going to do is cut these people out, and then, there’s a little trick I’m going to show you so we don’t get the fringing around the edges which usually happens when you blur the background, and then, we’re going to create this bokeh effect.
Why don’t we start off by just cutting them out quickly with the Quick Select Tool. Grab that Quick Select Tool and move it over the areas you need to select. Hold the Alt key or the Option key to remove from the selection.
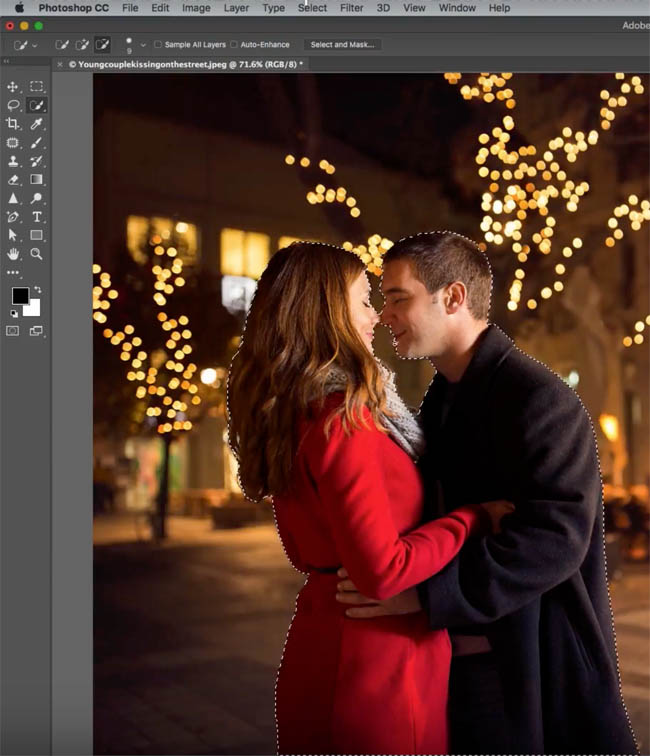
It’s looking pretty good, but I just want to check my selection. Hit the Q for Quick Mask, to view in Quick mask. You are checking for areas left out. It’s looking not bad at all. Press Q to exit quickmask.

Choose the Select and Mask right now, and I’ll give it a little bit of radiance just to make it look better, and clean it up a little bit. We’re going to choose the new layer with a layer mask option.
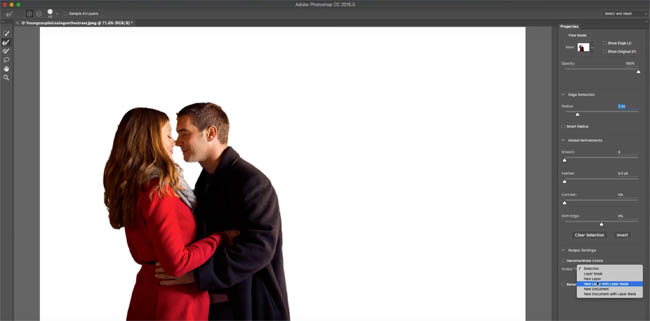
We’ve got them cut out
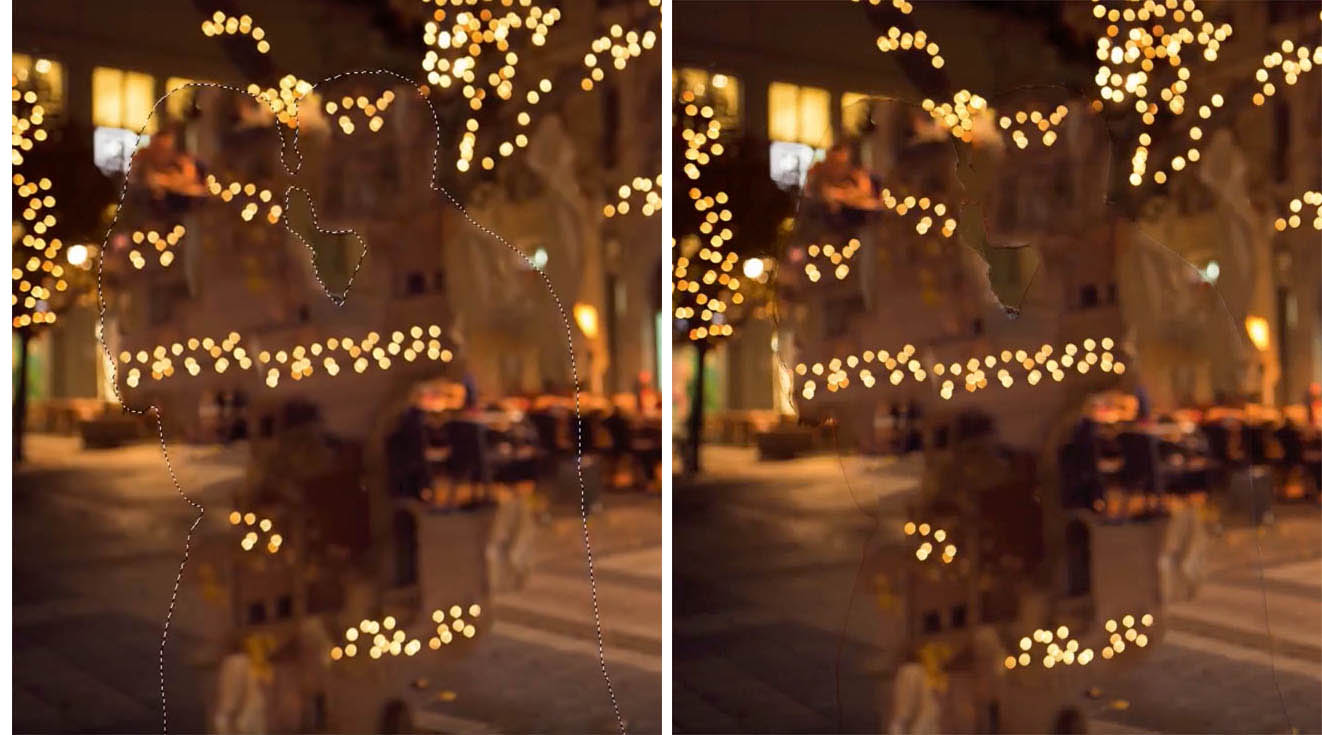
Hide the top layer and select the bottom to see this as the background. So here’s the thing that happens; When people do a simple blurring of the background like this, notice this fringing we get around the edges there? You can see it’s almost like a halo effect or a doubling effect there. Hit the Cancel right there and let me show you a better way.
Here’s how we can do to eliminate this problem. With the background still as the active layer, Ctrl click on the layer mask to make a selection.
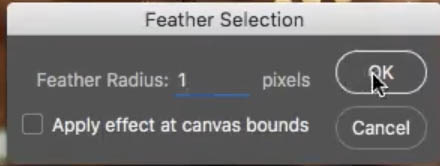
Choose Select, Modify, and expand this by 1 pixel, and then, choose Select, Modify, and feather it by 1 pixel. This is just creating a softer edge than just that hard edge.
Use Content Aware Fill. Hide the top layer so you can see what we are doing.
Press Shift + Delete on Mac, (Shift + Backspace on Windows), to bring up the Fill dialog box. Make sure you select Content Aware, and then, just click okay. You can see we got this kind of ghosting effect, but that’s all we need to make sure we don’t get those colors bleeding around the edges when we blur it later on.

Turn the top layer back on. We’re almost there.

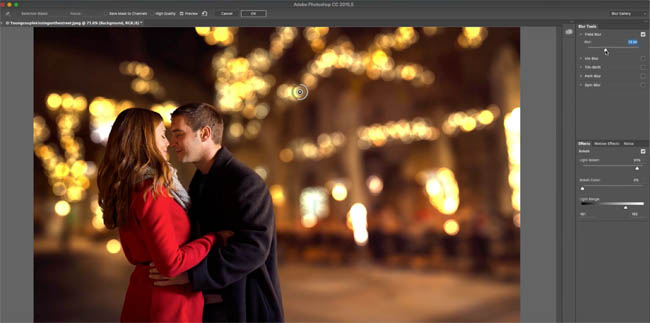
Now, we want to create a soft blurred background, but we want to really enhance this bokeh in the background that comes from the lens, and that gives it that really nice romantic look. And that also makes it look like it was shot with a much more expensive lens.
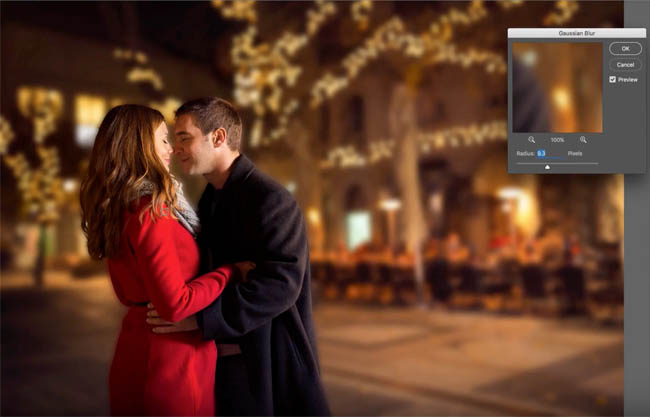
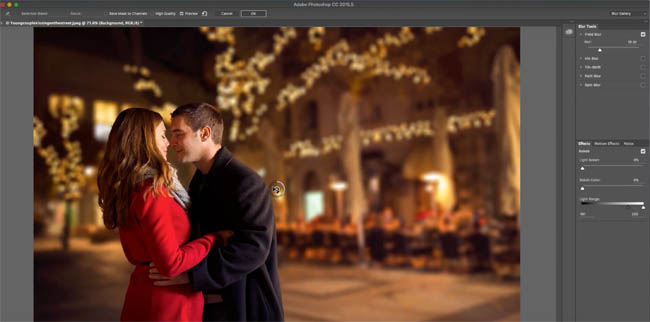
So let’s make sure the background is selected, then we’re going to choose Filter>Blur Gallery>Field Blur
We’re doing this here inside of Photoshop CC/CS6. Now, the Blur Gallery was added in Photoshop CS6, (if you have an earlier version, just use the Blur>lens Blur, and you’re going to get a similar result.)
The Field Blur, is where we create a depth of field effect by applying two points normally. We’re just going to keep this single point create a blur. Right now, we’re at about a 15 blur and we really want to bring this effect out. It takes a little bit of experimentation to get it just right.
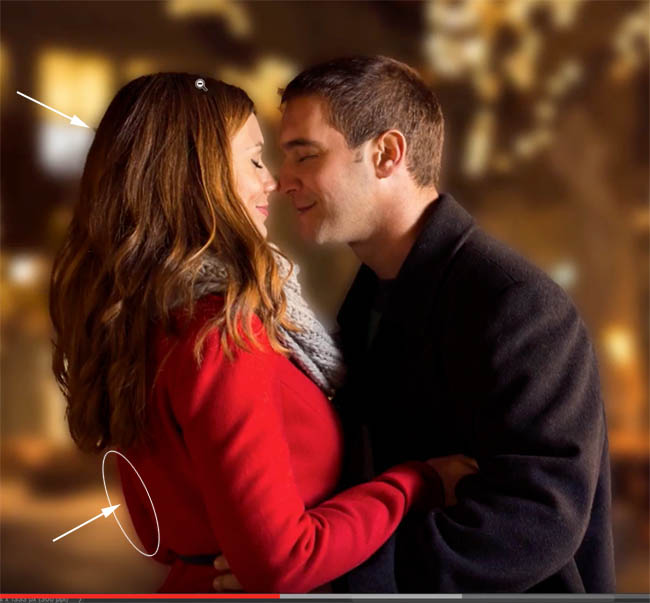
Start with Light Bokeh and we’re just going to move it up a little bit until we start to see some of that bokeh effect. Okay, it’s starting to happen, but it’s not very clean yet.
Play around with the Light Range. We’re going to actually clamp it down, and so we bring the white triangle in. Bring the black a bit more and, have these almost on top of each other to get the effect we’re looking for.
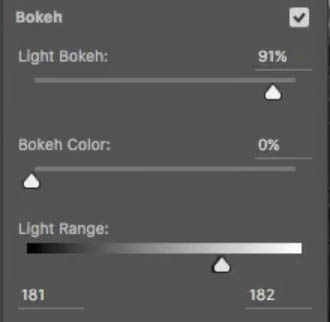
Let’s increase the blur; there we go, and notice, this changes the size of the round disks.
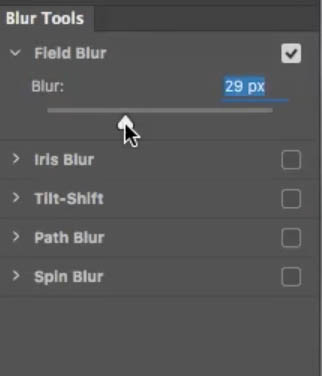
This is just really a balancing act of just playing around with the Light Bokeh, Light Range and Blur.
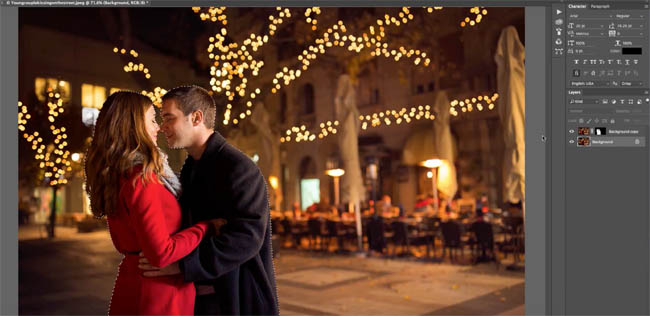
If we hide the top layer for a second and look at our background, notice it’s beautiful and seamless because we used that Content Aware Fill, there’s no fringing or anything around there, and so we’ve been able to create that effect just like that.

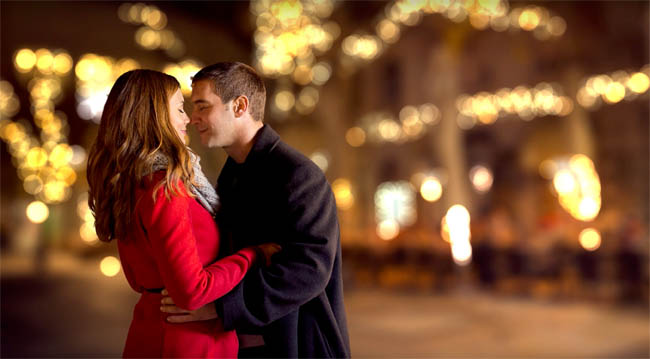
So if we’ll look at it before and after, you can see how much more dreamy and romantic this photograph is.

How to cut out a person with quick select and refine edge (CS5-CC)
Extracting hair in Photoshop (CC)
Masking impossible images in Photoshop (all versions)
Learn the how to use a DSLR Camera here with this premium tutorial from Tim Cooper.
Thanks so much for checking out this tutorial. The CAFE is so full of free resources, you should check them all out. I’m adding at least one new tutorial every week!
Great to see you here at the CAFE!
Leave a comment, say hi! (Join out mailing list and become part of the CAFE Crew and get a new tutorial every week)
Colin

This site uses Akismet to reduce spam. Learn how your comment data is processed.

The Face Aware Liquify in Photoshop C enables you to easily change someones face to look like someone else. See...

In this Photoshop Tutorial, Colin shows you how to combine type and photos in Photoshop. Learn how to place a...
5 of the most useful Photoshop Tips you will know! Here is a roundup of some very useful tips that...


Great tutorial. Thanks
Great use of Content Aware Fill.
This was AWESOME! Someone has finally done it — producing an excellent, easily understandable visual tutorial combined with very thorough notes WITH illustrations. Benefits: being able to actually watch the tutorial without scribbling notes and being able to recreate what was taught by referring to excellent notes without having to re-watch the tutorial or worst, skip trying because you can’t remember what to do. Thank you!
Thanks Plumeria, we have this on most of the tutorials here at photoshopCAFE. My goal is to eventually have written instructions for every tutorial
Thank you! I’ve had exactly the problem of bleeding edges of foreground and had never thought of this solution. I found your tutorial really easy to learn from. Thanks again!
Excellent tutorial on making the background blur perfectly. Thank you for sharing!
Thank you for clarifying how to artistically work with a background.
Your Blur Tutorials is beautiful and i hopes all the new Photoshop learner are knowing a good knowledge about this tutorial.So thanks for share this great Tutorial..
WOW!! beautiful tutorial for Photoshop..Thanks for shsare
this is an awesome and more informative Photoshop tutorial. i have got more image editing idea from here. thank you so much for this best idea
I’m lost at “We’re going to choose the new layer with a layer mask option.” What new layer? I only see one layer.
Don’t forget to share your images with the community on our facebook group https://www.facebook.com/groups/53878338135/
Hey Colin,
I loved this post because of the workflow and in-depth explanation. I have been wondering how I can give a bokeh effect in photoshop for so long. Here, I found your post with all the answers to complete the job.
Thanks,
Abhinay
Step 2) My mask is already inverse by selecting the stuff I want to keep in focus?
Step 3) Under Selection, there is no point Mask. How do you make this new layer?
Sorry, I found this hard to follow.