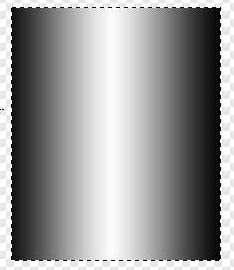
Begin with a cylinder. or make your own with the gradient tool.
If you make your own, set the gradient to reflected and linear.
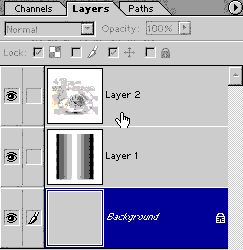
Open the object you want to wrap around the cylinder and put it on its own layer on top.
Here is where it all happens:
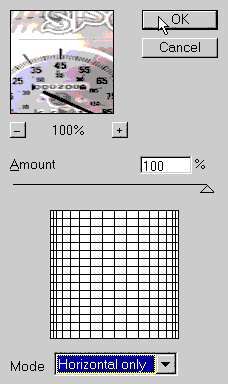
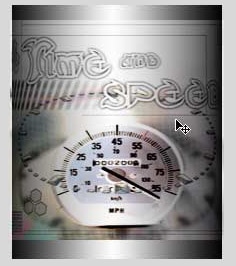
Filter>Spherize set the amount to 100 and change the mode to horizontal only.
Click ok
See how it looks distorted?

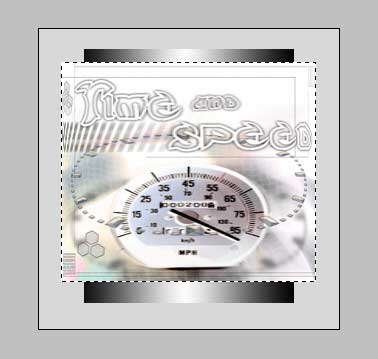
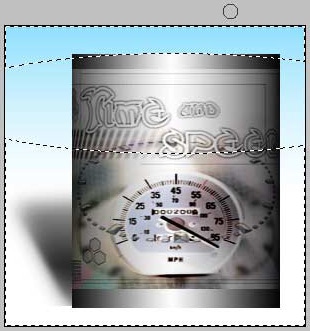
Press Ctrl/Cmd+T for free-transform.
Drag the sides in until it matches the size of the shape.
 This step will add a boost of realism.
Change the top layer to multiply mode. See how it appears to blend into the cylinder, and it shares the shadows and highlights.
If you want a more rounded look on the ends of the cylinder:
Make a huge selection with the circular marquee tool.
Invert the selection. Ctrl/Cmd+Shift+I
Now use the eraser tool to erase the corners away.

This site uses Akismet to reduce spam. Learn how your comment data is processed.
You asked for it and you got it. More Intermediate/Advanced Tutorials Step up to the Microphone please. We are going...
How to create a motion blur on a background to make a photo look like its moving. We will learn...
I have had many people ask how to save transparent gifs in Photoshop This tutorial will also show you how to...


Leave a Reply